As of 2023, three email authentication protocols are commonly adapted and used together:
- SPF,
- DKIM, and
- DMARC.
If you send cold emails, consider implementing each of these three authentication protocols on the domain you’re using to send them. They are bound to improve the deliverability of your campaigns, resulting in fewer bounced emails.
And unless your cold email setup is unusual, implementing SPF, DKIM, and DMARC shouldn’t take more than 30 minutes.
How SPF, DKIM, and DMARC boost cold email deliverability
SPF, DKIM, and DMARC use various methods to validate that you were authorized to send an email from your server and your domain and that the message was not altered during the sending process.
This can establish a higher level of trust between your email server and the receiving server. And trust is critical for the probability of your messages landing in the recipient’s inbox.
This is especially important for cold emails because the first message you send to a prospect is held under particular scrutiny. After you get a reply, the threshold for your message to land in the inbox is lowered.
Validating your domain ownership is also key in assessing your domain’s sender reputation. After all, if the receiving server can’t be certain that you own the domain, it makes no sense to look up its sender reputation.
SPF verifies whether or not you’re allowed to send emails signed with your domain name. Emails that don’t pass the SPF check will likely come from malicious spammers who forged the “From:” address. And emails from spammers tend to land in… spam. Conversely, passing the SPF check means you’re an authorized sender. This increases the receiving server’s trust in your identity.
DKIM verifies the integrity of the message – meaning its content wasn’t changed after it was sent. It’s another reason the receiving server thinks your email message is legitimate.
On top of SPF and DKIM, DMARC boosts your deliverability by further proving that your email message was sent from an authorized email server. And if it wasn’t, DMARC lets you specify what to do with it. Your DMARC policy can tell the receiving server to accept, quarantine, or reject emails that failed the authentication checks.
Implementing these three policies makes the servers that receive your cold email more confident in the authenticity of your messages.
Of course, other factors, like the actual contents of your message, also influence your deliverability. But compliance with SPF, DKIM, and DMARC boosts your deliverability before your message is even analyzed.
How to implement SPF, DKIM, and DMARC
Implementing SPF, DKIM, and DMARC on your domain is simple. All you need to do is:
- Find or create SPF, DKIM, and DMARC DNS resource records recommended by your email service provider, like Google Workspace or Outlook.
- Access your DNS database via your domain registrar, like Namecheap, GoDaddy, or Google Domains.
- Add the three relevant records and wait for them to propagate.
While there’s no obligation to implement all three policies simultaneously, I strongly recommend doing so.
Let me guide you through finding and implementing all three policies. When showing specific examples, I’ll be using Google Workspace and Namecheap. However, implementing all three authentication protocols will be similar regardless of your email service provider and domain registrar.
Before you start
While you can have multiple records for DKIM if you’re using multiple email providers with one domain, you must have exactly one record for SPF and DMARC. If you have more, receiving servers will treat them as invalid. Unless you’ve managed your domain on your own from the start, you may want to first check if some records already exist.
The quickest way to do so is to use MXtoolbox.com.
Start by looking for an SPF record by going to https://mxtoolbox.com/spf.aspx and pasting your domain address in the search box.
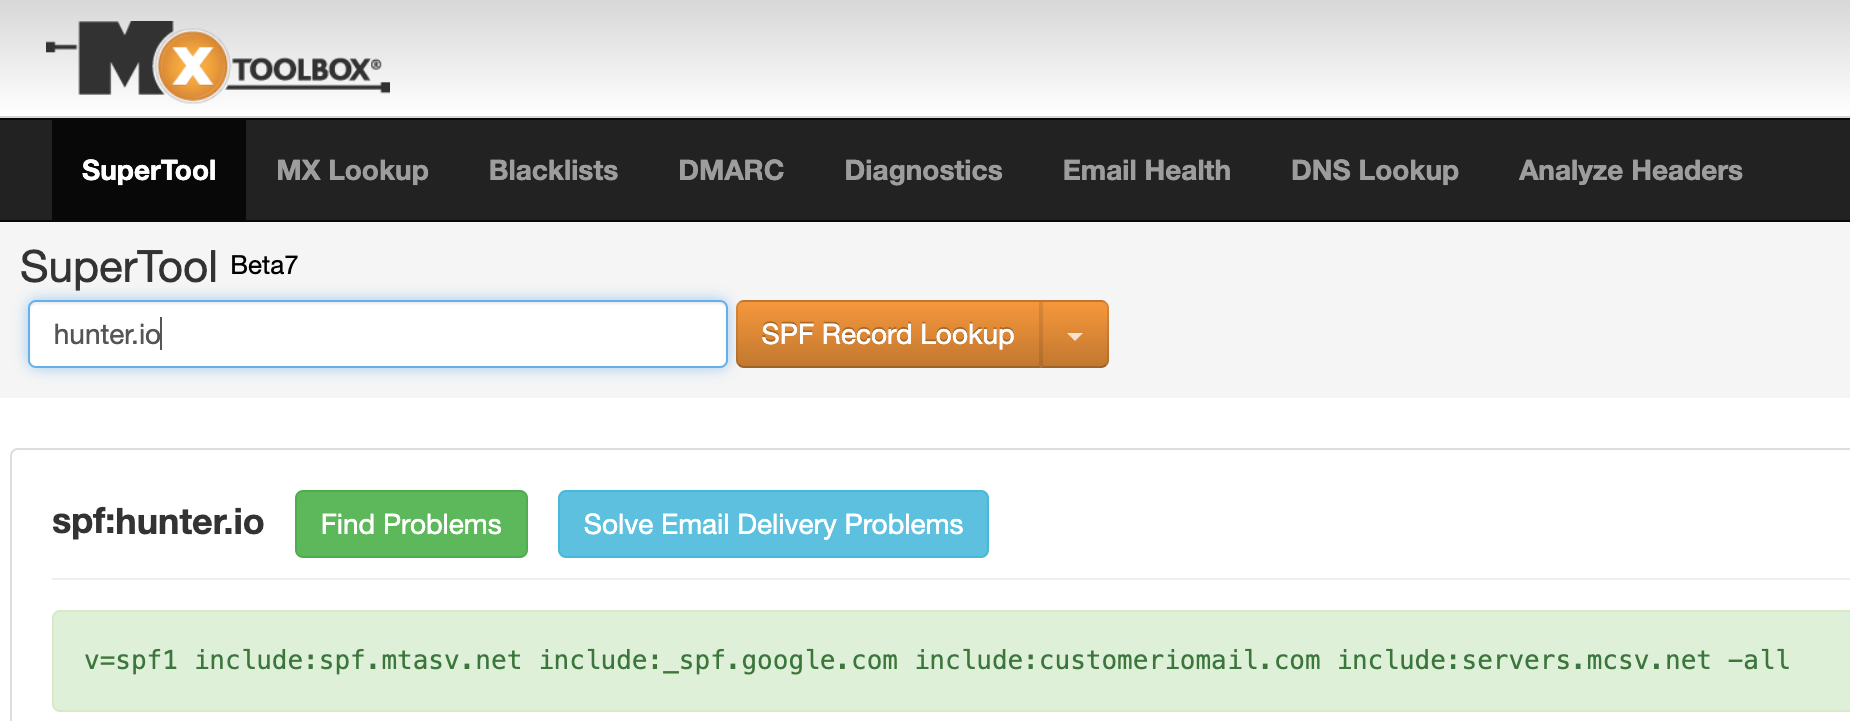
In the case of hunter.io. MXtoolbox found an SPF record, so I shouldn’t add a new one unless I delete the existing record.
Then, go to https://mxtoolbox.com/DMARC.aspx and do the same thing.
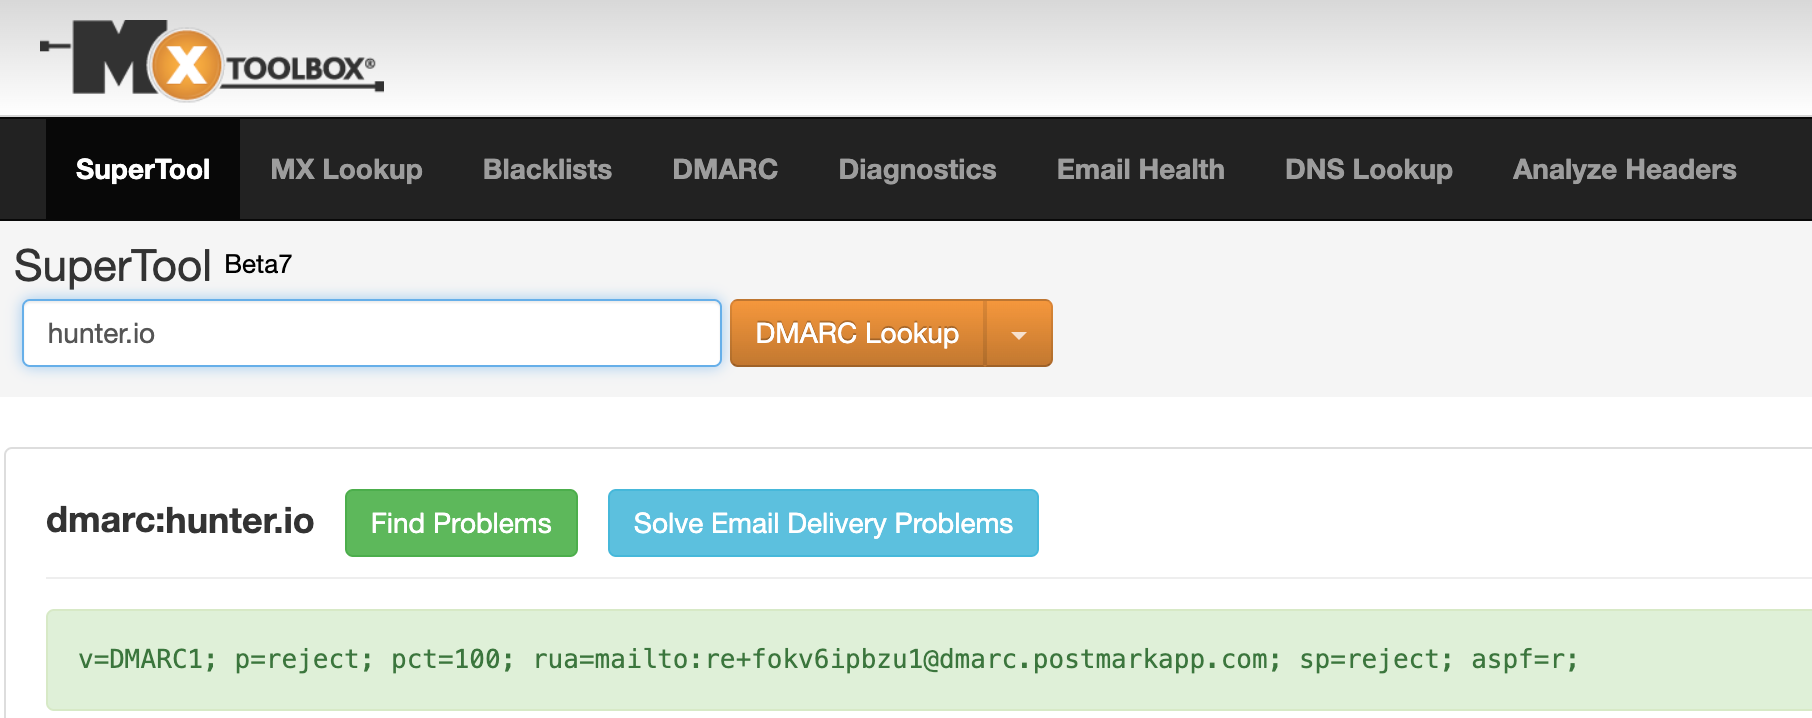
Again, in my case, the record already exists, so I need to leave it as is or delete the record before I add a new one.
However, If you find no records associated with your domain, you can proceed.
1. Find the relevant records
The exact SPF, DKIM, and DMARC records you need to implement will differ depending on your email service provider.
Find your SPF record
Unless your email setup is more complex, your SPF record will be the easiest to find. Most email service providers have help pages that provide the record for you, so search for your ESP’s advice on SPF.
If you’re only using Google Workspace, you can safely use the following record:
v=spf1 include:_spf.google.com ~all
Find your DKIM record
Implementing DKIM requires you to generate a public and private DKIM key. You can generate these keys within your Admin panel at your ESP.
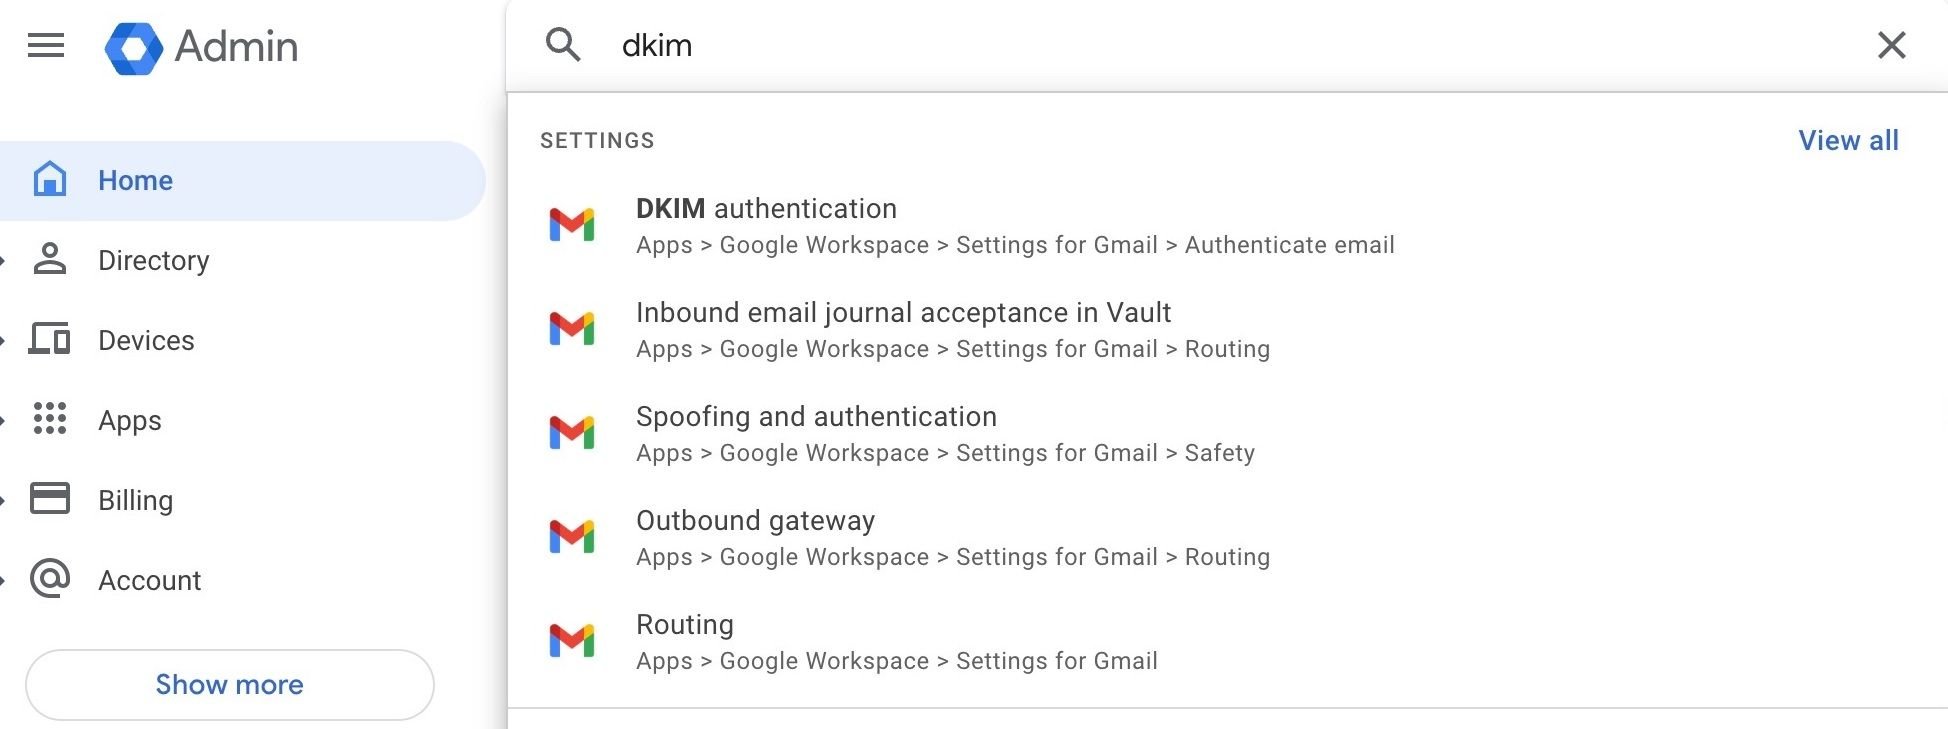
With Google Workspace, I log in to my Admin panel and search for “DKIM.”
Then, I navigate to DKIM authentication and generate my DKIM public key there.
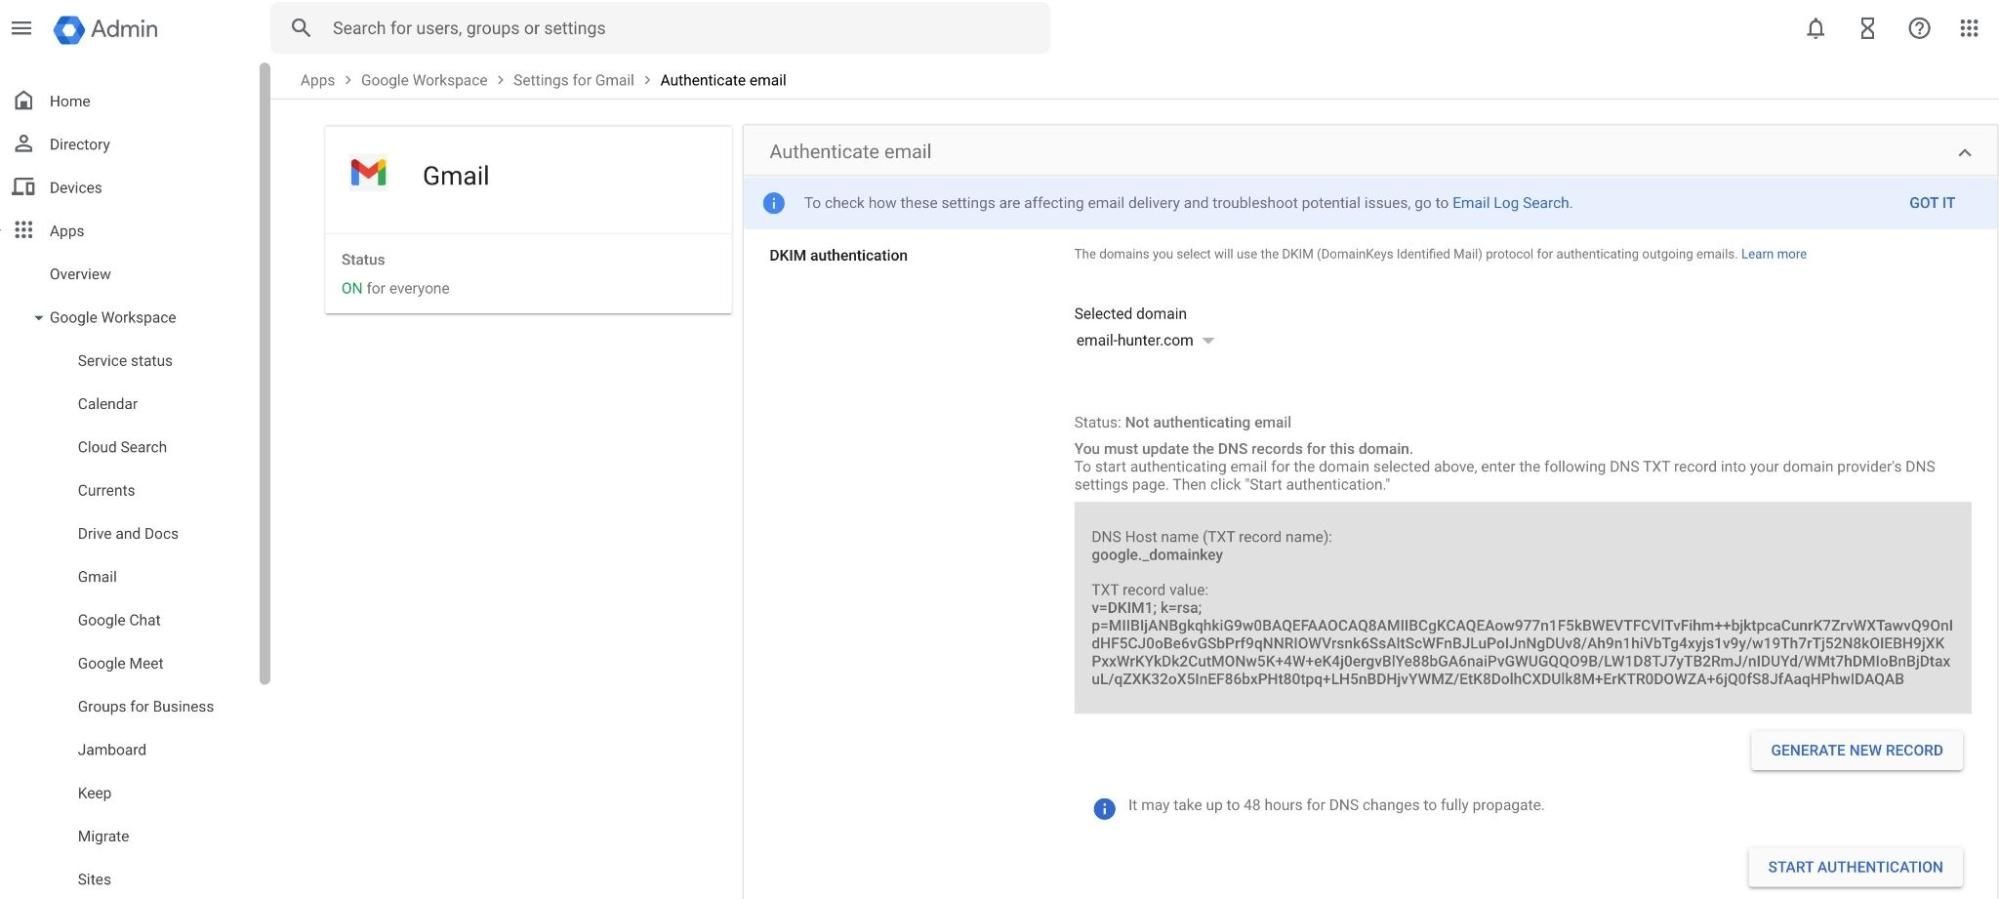
The generated DKIM key you see in the panel is the public key you’ll upload to your DNS records at a later step.
Google Workspace will securely store the private DKIM key; you don’t need to worry about it.
Create your DMARC record
Creating your DMARC record requires more consideration because you have to choose from three DMARC policy types. These policies advise the receiving server about what to do with emails that fail the SPF and DKIM checks.
If you’re just setting up your SPF, DKIM, and DMARC and don’t have experience working with these protocols, you can start with a “p=none” policy. Although this policy offers less protection to your domain reputation, you won’t risk having your email bounce, and you’ll still receive DMARC reports which are essential when troubleshooting deliverability.
However, after you ensure all three email authentication protocols are set up correctly, you should change your policy to “p=quarantine” or “p=reject.”
An example of a DMARC record with a “none” policy is:
v=DMARC1;p=none;rua=mailto:dmarc@example.com;
This record leaves the decision about what to do with emails that don’t pass the SPF and DKIM checks to the receiving server. Aggregate reports about DMARC checks will be sent to dmarc@example.com.
2. Access your DNS and upload SPF, DKIM, and DMARC records
Your domain registrar manages your domain’s DNS records. You’ll need to log into your domain registrar account to add the necessary SPF, DKIM, and DMARC records to your DNS database.
If you don’t know your domain registrar
If the domain was bought by someone else in your organization or you’ve forgotten which company you used to buy it, you’ll need to try and find that information. If nobody in your organization knows, try looking through your billing history. You can also use ICANN Lookup to try and locate your domain registrar:
- Enter your domain name in the search box.
- Navigate to the “Registrar Information” section (in the case of this particular domain, the registrar is Google Domains.)

For some registrars, you’ll find an ID number without the name. You can then find your registrar by looking up the ID on IANA.org.
Add the DNS records for SPF, DKIM, and DMARC
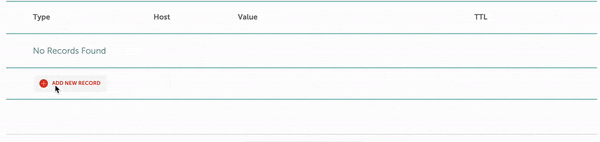
Once you log in to your registrar, look for the option to add DNS records.
For example, with Namecheap, you need to navigate to Advanced DNS.
All three records must be added as TXT records, but at different hosts.
First, I add my SPF record with the “@” host.
Remember that SPF policies only apply to the domain on which the SPF record is hosted. So an “@” SPF record for helloworld.com won’t apply to mail.helloworld.com!
Then, I add my DKIM record. I use the hostname and the value provided by my email service provider. As a reminder, you must generate your record value within your account – DKIM keys aren’t shared.
Finally, I upload my DMARC record with the hostname of _dmarc. My policy is “p=quarantine,” but remember you can start with “p=none”, too – this policy won’t make your emails go to spam in the case you misconfigured your SPF and DKIM.
That’s it! All three policies are implemented.
Like with all DNS records, you’ll have to wait for anywhere between a couple of hours to a couple of days before they fully propagate across all DNS servers.
Next steps
With email authentication protocols implemented, you should move to learn about email blocklists so you know how to avoid them.