
Personalization is often the key to converting a lead or starting fruitful cooperation. Long gone are the days of sending thousands of identical emails, hoping that something would stick with a receiver. Nowadays, each email you send needs to be properly personalized to maximize its effectiveness.
At the same time, it’s not feasible at all to be manually editing hundreds of emails. The risk of failure is high, and it’s not the most fascinating job in the world either. With Gmail mail merge, you can automate the process and grab the attention of leads in no time.
In this article, I’ll explain what mail merge is and for what it’s commonly used. I’ll show you step by step how to verify your leads, plug them into an email template and send emails from Gmail right into the recipients’ inboxes.
Why And How to Mail Merge in Gmail?
Email is just one of the use cases for mail merge campaigns. It’s been used for many years for any written mail that arrives into our physical mailboxes. These are bank statements, electricity bills, invitations to that “awesome” pot collection presentation you can’t miss.
Each of these letters relies on an identical template that someone inserts your personal details into, printing thousands of personalized copies with a single click.
It works identically for emails. You always start with an email template that contains the copy to be sent to multiple recipients. Wherever you feel like inserting a personalized copy, you place attributes instead (also known as placeholders).
Then, you plug in a file containing all the relevant details. The software you use merges both sources and returns thousands of personalized emails, ready to be sent.
Mail merge is extremely helpful in many situations, including:
- Cold emailing - Leads are more likely to open and interact with an email if it’s personalized to them.
- Lead nurturing - Based on your research, you can try to sell different benefits to different customers through mail merge.
- Link building - When trying to place a link on someone’s content, you want to be very specific on where a link should go and why it’s such a great addition.
- Newsletters - Inserting someone’s name is just one thing. Personalizing the content for each recipient is a whole new level.
- Events - If you invite different groups to different events, you want to include vital details in each message. At the same time, you don’t want to mess things up, and mail merge makes it much easier to keep track of what’s sent to each recipient.
Mail merge in Gmail is a common choice across different industries. Everyone knows how to use Gmail. Its users, especially those on the paid Google Workspace plans, enjoy very good email deliverability. What’s more, when sending via Gmail, you’re more likely to avoid the dreaded “Promotions” tab and go straight into the recipient’s inbox.
How to Do A Mail Merge in Gmail
I’ll now explain step by step how to use mail merge with Gmail.
Gmail doesn’t have a built-in mail merge functionality. There are, however, many different services you can use to personalize your campaigns. A very popular choice among sales and marketing folks to mail merge in Gmail is Hunter Sequences.
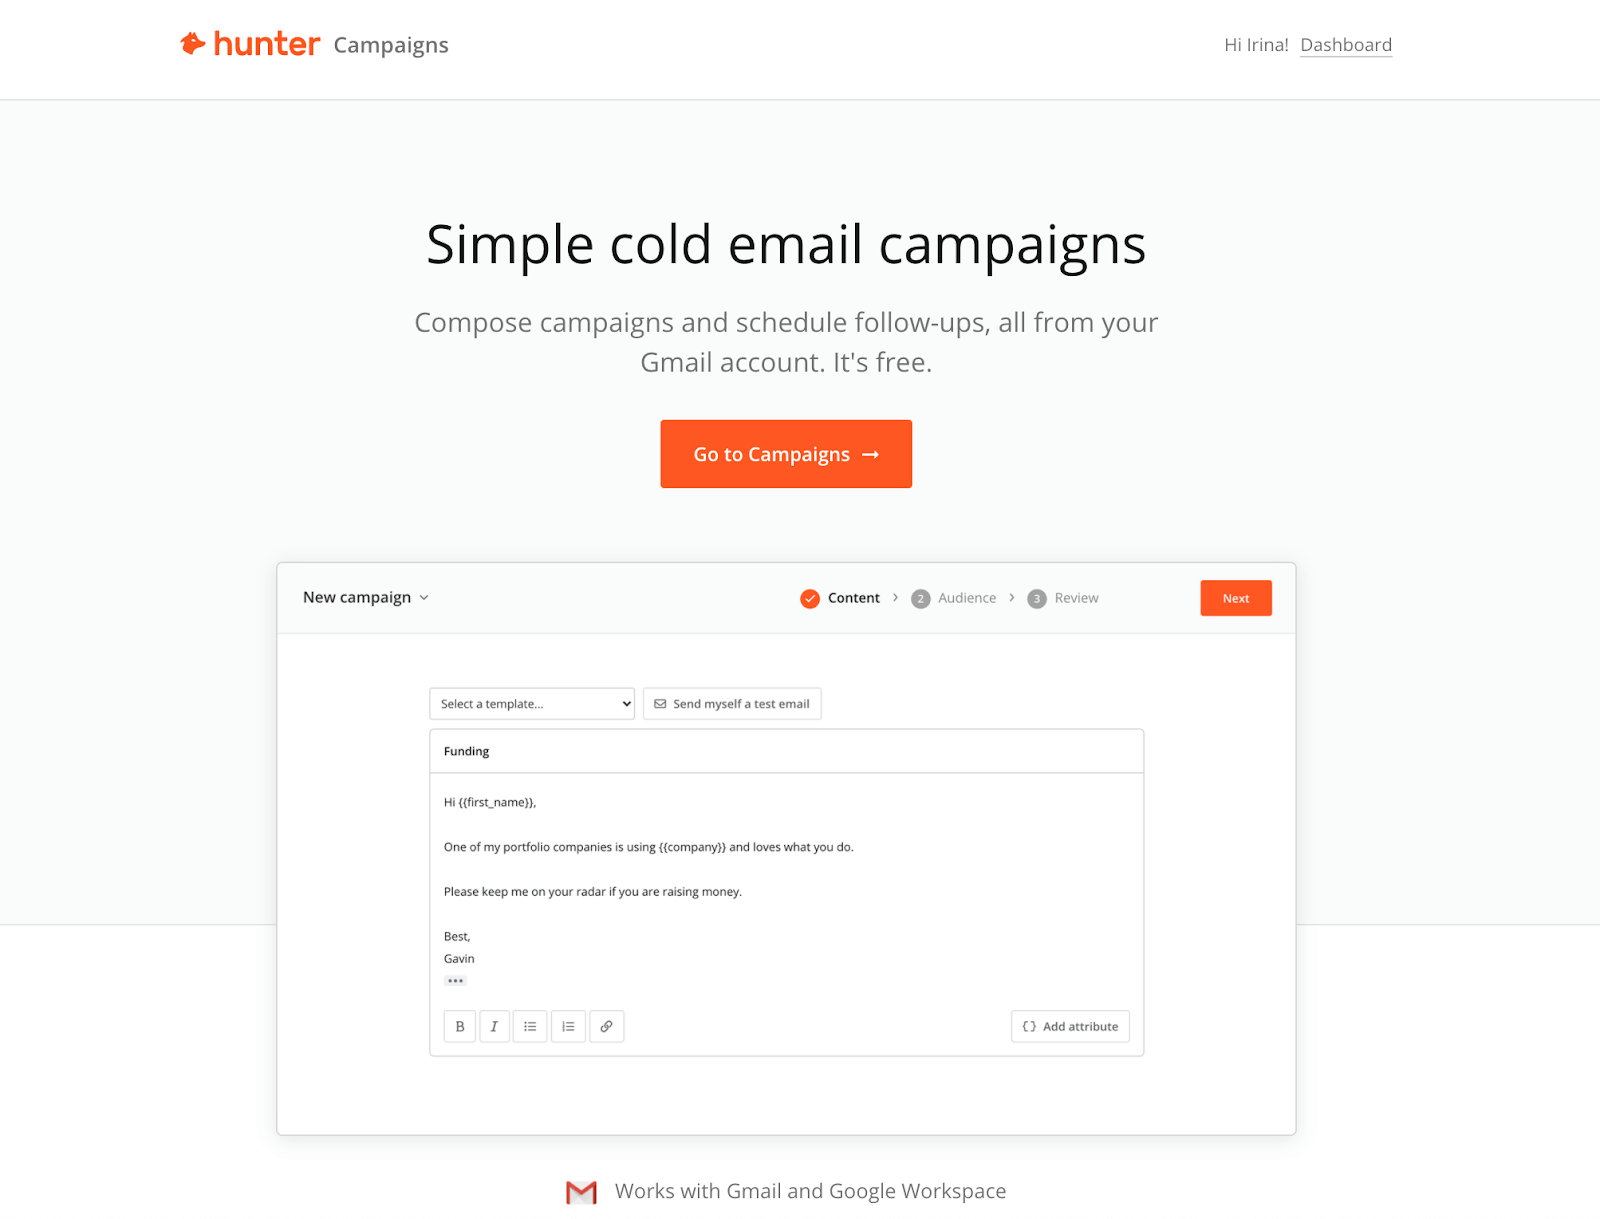
Hunter Sequences is an email outreach tool for crafting personalized emails and sending them in bulk via Gmail. They come with a list of ready-to-use templates and many other tools from the Hunter suite. With them, you can find the emails from any given domain, verify them, and send personalized emails to them right after.
Hunter Sequences is free to use and doesn't require installing any add-ons. To start the mail merge, create a free account if you haven’t yet done so and proceed to the next step.
How to Set Up Gmail Mail Merge Using Hunter Sequences
The next step is to decide to whom you’re going to send the campaign.
If you already have the list ready, jump to the verify your emails section. If you’re still not sure how to reach your leads, read on.
1. Find the email addresses.
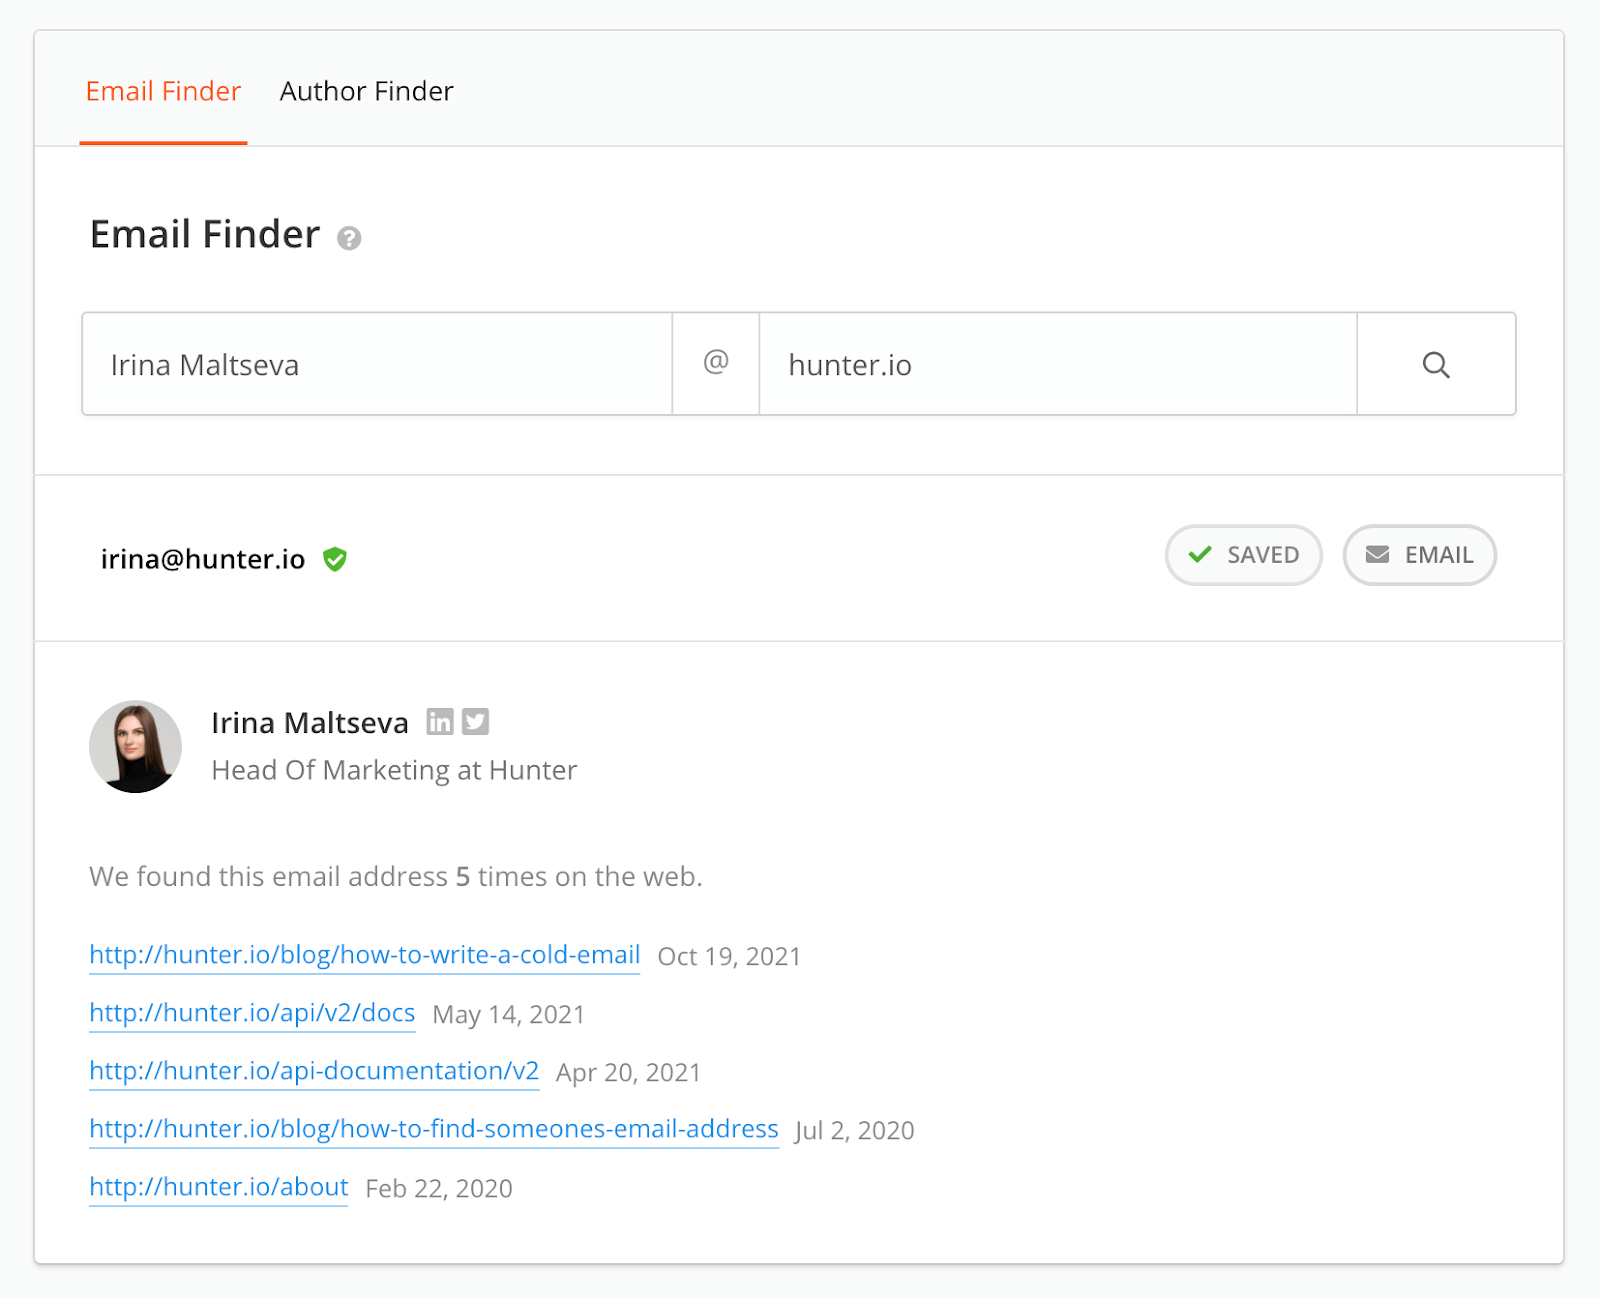
Hunter’s Email Finder helps you find the email of a person with whom you’re trying to get in touch. For, example, in the search box, type in the first name, last name, and domain.
Momentarily, Hunter will scan through the web, searching for any mention of the person’s email address. It will then return the most likely candidate, the list of sources found, and the verification status.
In the example below, this is indeed my email address that was found. You can see a green shield near the email address, which indicates that it’s verified. You can also see that the email has been mentioned in the recent publicly available sources.
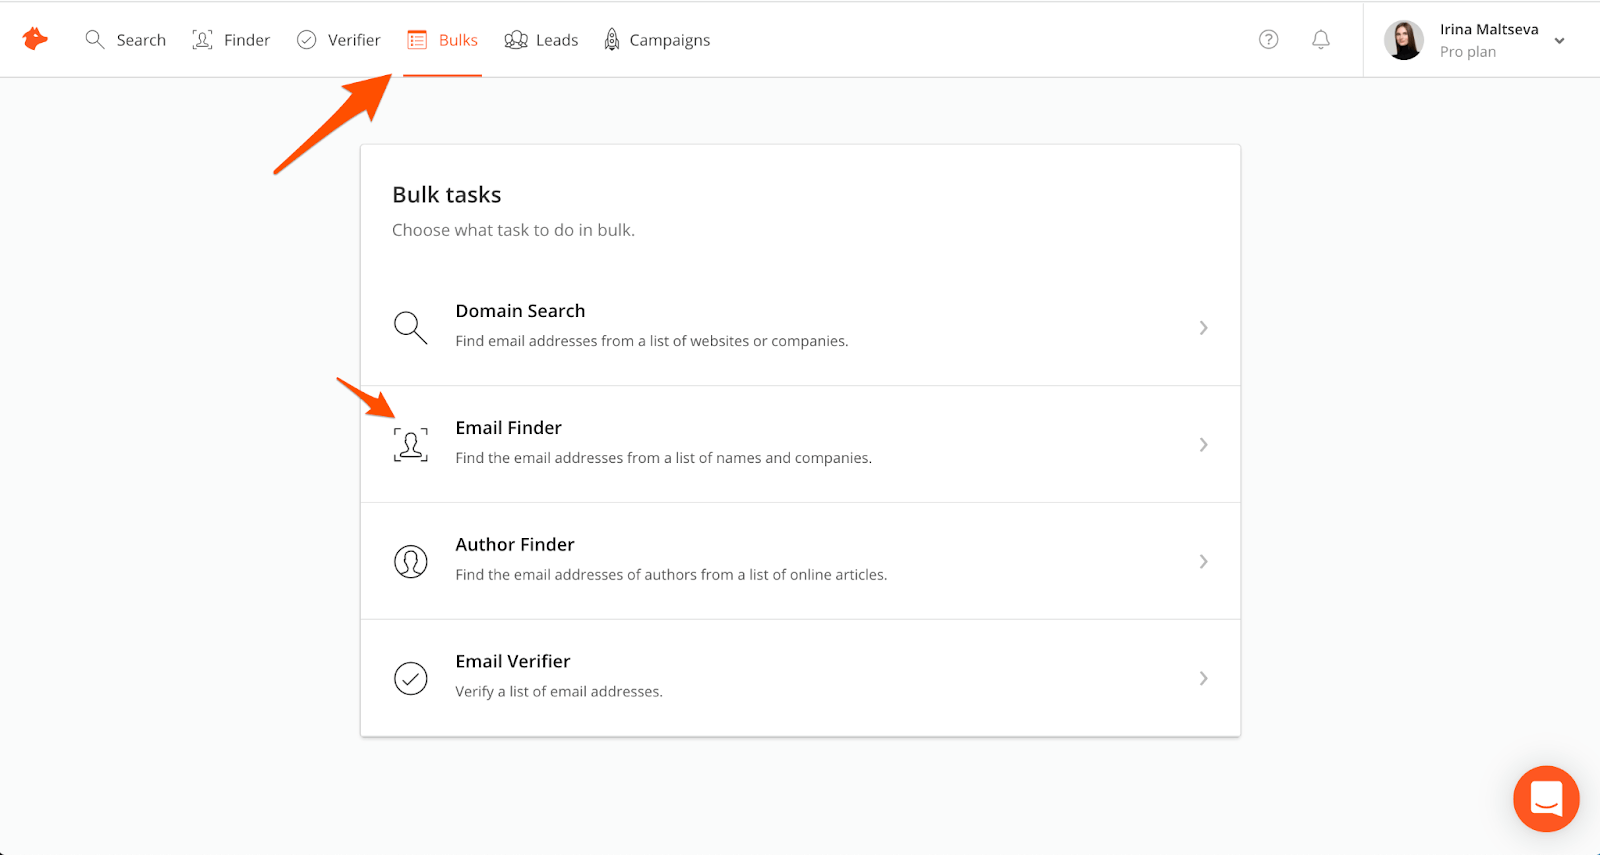
This approach works well when you have a few or a dozen leads to check. What if you’re building the list, though, and you’re trying to add hundreds of reliable contacts to your Google Sheet? This is when Bulk Email Finder comes in handy.
- In the Bulks section of the menu, find Email Finder.
- Select + New Bulk.
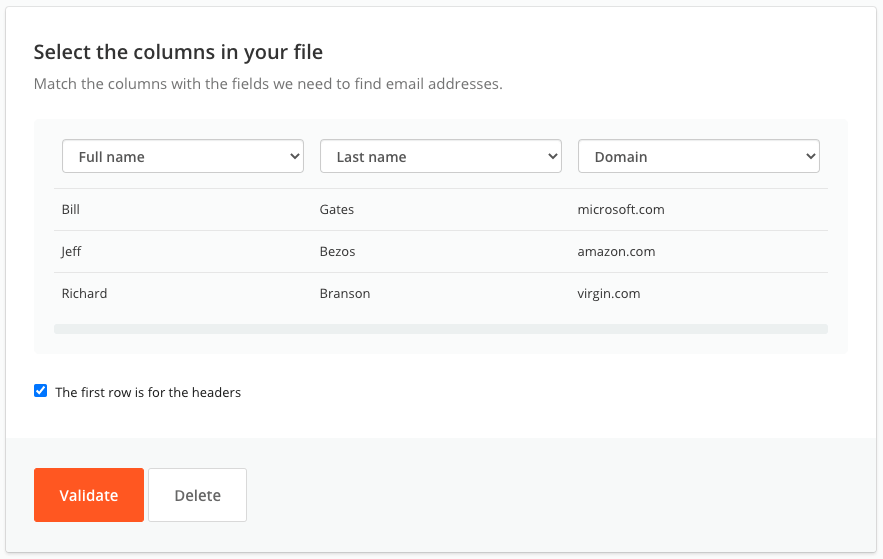
- Then, upload a CSV or TXT file with the list of people you’re trying to find. Include their first name, last name, and domain. You may use the company name instead, but the results will likely be more accurate if the domain is provided.
- Confirm that the headers are intact and press Validate.
- Wait while the list is processed, and the owners’ email addresses are returned.
Note: If you collect and organize data in Google Sheets, you can use Hunter for Google Sheets add-on to find emails right there.
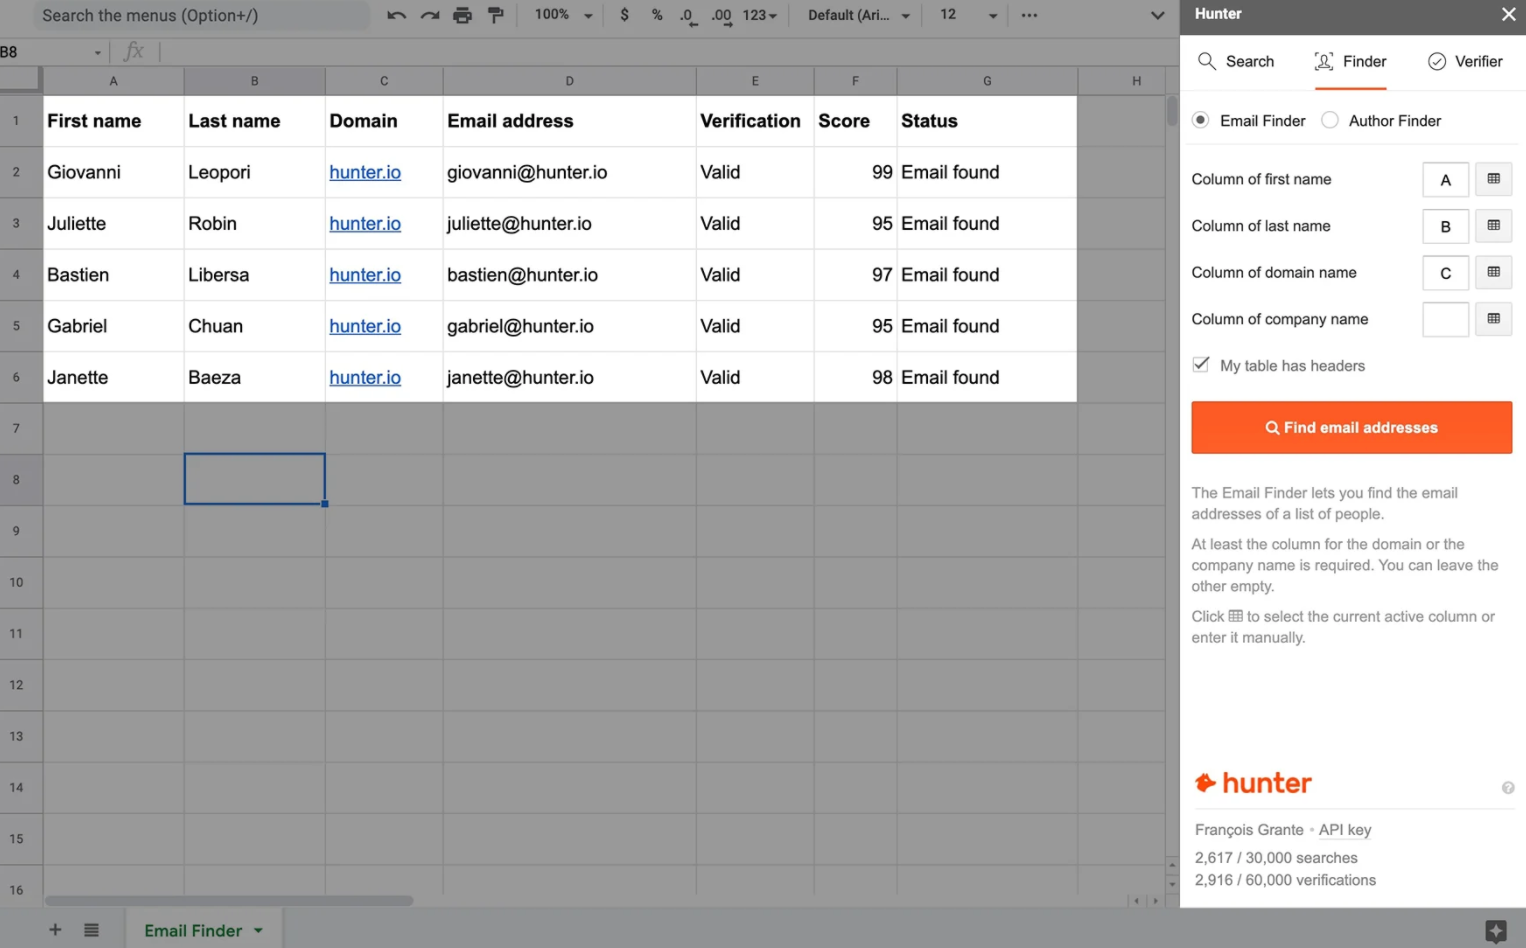
If you have a list of full names and company domains in your Google Sheets, you just need to click Find email addresses button in the Google Sheets add-on, and they’ll automatically appear in the following column and will be ready for your mail merge in Gmail campaign.
2. Verify the emails.
No matter where your list comes from, you should always verify each email. It’s especially true if you bought the list (which we don’t recommend doing) or fetched it from another peculiar source.
Every time you send an email to a non-existent or non-responsive address, the message will bounce. It may not seem that bad if out of, say, 1,000 emails, a few dozens drop. But, it’s not good for your future email deliverability.
In other words, the more your emails fail to reach their recipients, the fewer will be delivered in the future. If the pattern continues, your emails will often end up in spam, and Gmail may even suspend you at some point.
Do yourself a favor and run a quick verification with Hunter, that you can do in two ways.
If you have your contacts in a Google Sheets file, you can verify them without leaving a Google Spreadsheet. If you haven’t already done it, add a Hunter for Google Sheets add-on to your browser.
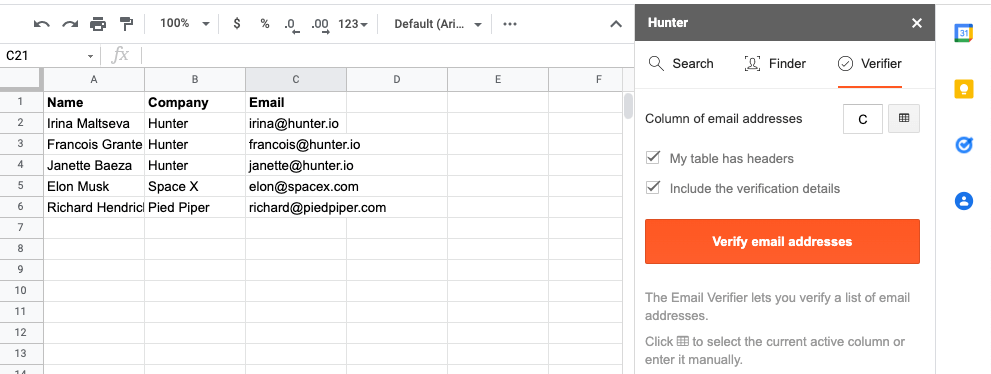
In Google Sheets, choose which column the emails are stored in; then, press the Verify email addresses. The extension will load and will then add additional columns with the verification results.

The verification status column indicates whether the email is valid or not.
If you don’t store your data in Google Sheets (for example, you use Excel file), you can upload the entire list and verify emails with the Bulk Email Verifier. Go to Bulks -> Email Verifier -> + New bulk. There, paste the list of addresses or upload a CSV/TXT file with contacts.
Afterward, press Upload. Verify that the headers were correctly detected and proceed to the final results.
3. Create a Gmail mail merge campaign.
With all contacts verified, we can start preparing the campaign.
First, go to the Sequences tab in the menu and sign in with your Google email account. It’s free of charge for a single account. Grant the needed access to your Gmail account so that Hunter can send emails on your behalf.

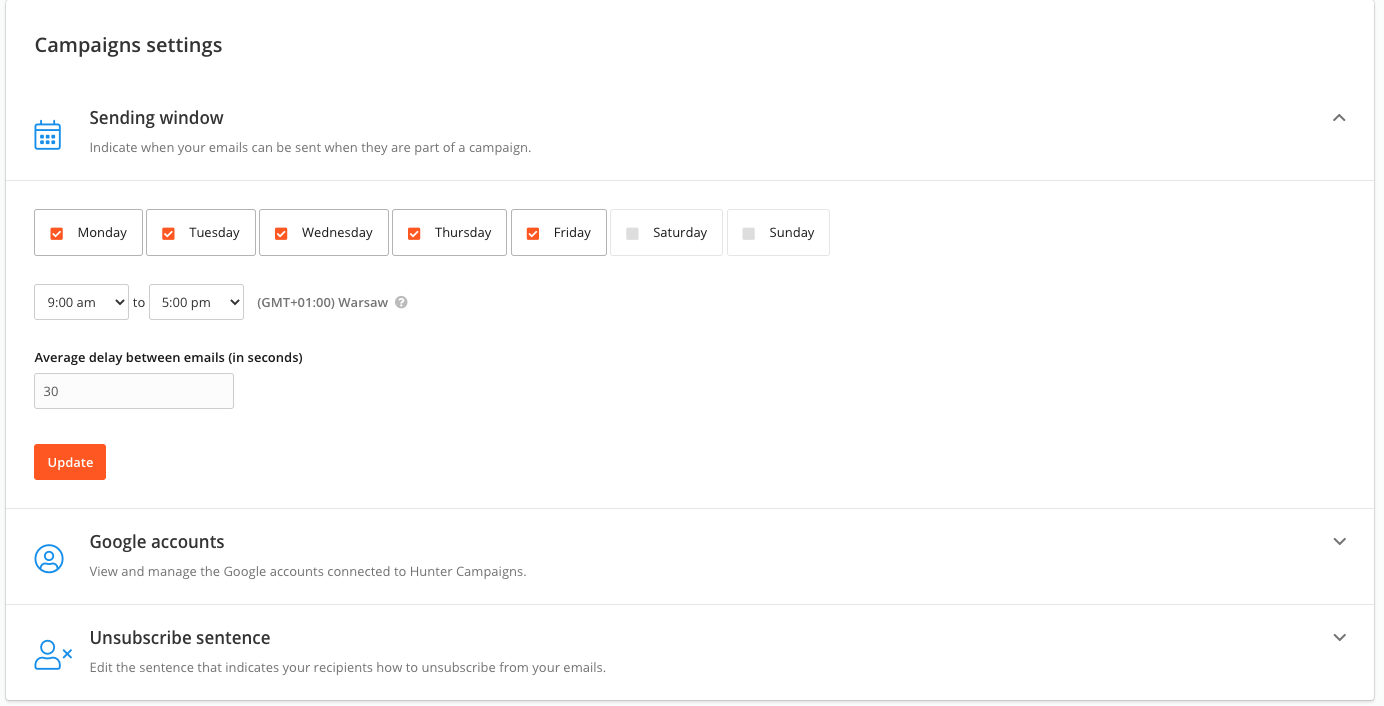
Before the explanation of how to mail merge in Gmail, it’s worth jumping to the settings to the left.
Here, you can specify the sending window for your campaigns and the delay between emails. It’s not a bad idea to increase the delay if you plan to send a bunch of emails. Sure, it will take longer to dispatch them, but the traffic will look more natural to Google servers.
Gmail allows for 500 emails sent every day, while the paid Google Workspace account comes with a 2,000 emails limit.
You can also connect to another account if you’d like and customize the unsubscribe message in other settings.
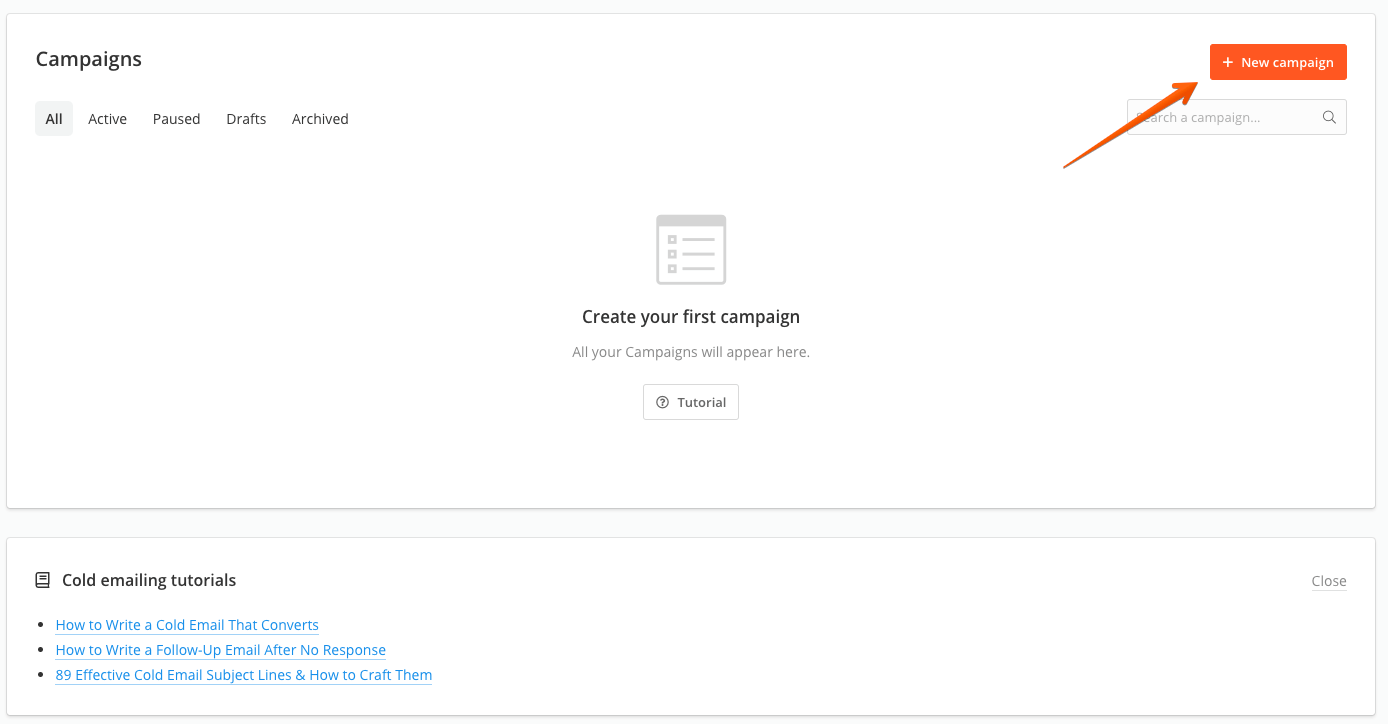
When finished, go back to the Sequences tab and press the + New campaign button.
If you connected more than one Google account, select from which one you want to send the emails. Then, type in your desired email subject line and the contents of your email.
When composing an email, insert as many custom attributes as you’d like. After all, that’s the core of Google Sheets mail merge in Gmail. Use the Insert Attribute button. Choose the type of attribute and insert the fallback text.
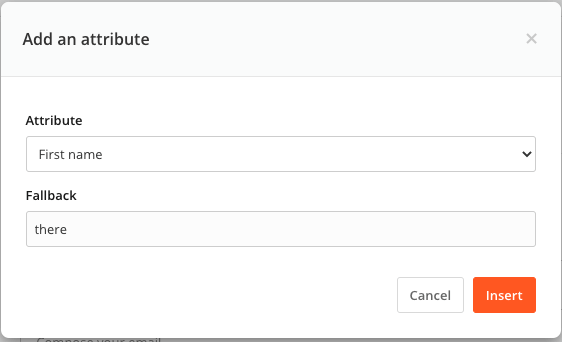
Fallback is used when no value is found in the source file for a given contact. For example, let’s say you’re sending to a contact list like this:
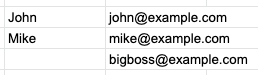
You’ll probably start with something like Hi [insert first_name]!. The first two contacts would result in “Hi John!” and “Hi Mike!”
Nothing would be inserted if it wasn’t for a fallback, leaving an awkward space before the exclamation mark (“Hi !”). Worse yet, some services leave the custom attribute as it is.
Using a fallback like, “there,” on the other hand, results in a more natural response. Sending, “Hi there,” for all contacts without a name makes it more personal than a simple “Hi!” or awkward “Hi !”.
If you wish to use any custom attributes, it’s now time to add them.
Go to the Leads tab from the menu on top. Don’t worry, any progress of your campaign will be automatically saved. Then, click on the Custom Attributes tab.

Add the attributes you’re planning to use. Once you do, make sure you add the respective values to your contacts, whether you store them in Hunter Leads or not.
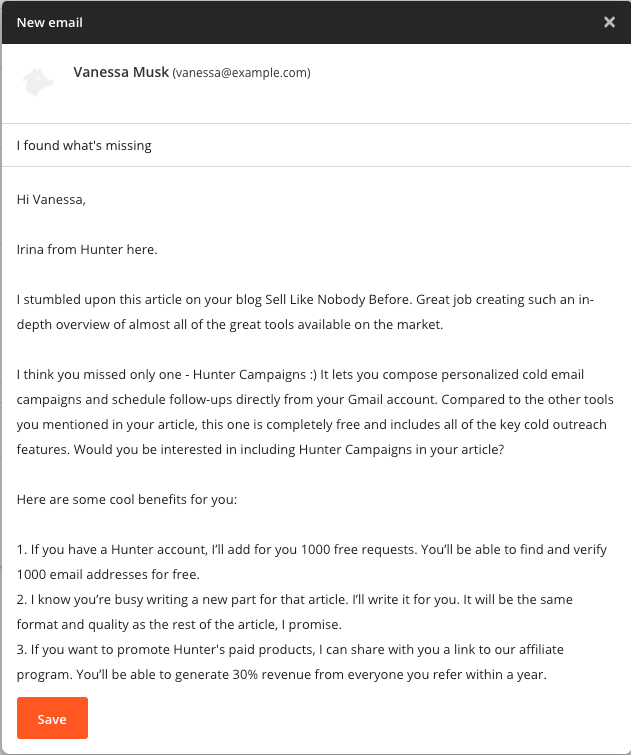
Go back to Sequences and compose the entire email template with the chosen attributes. For example, here’s my email template:
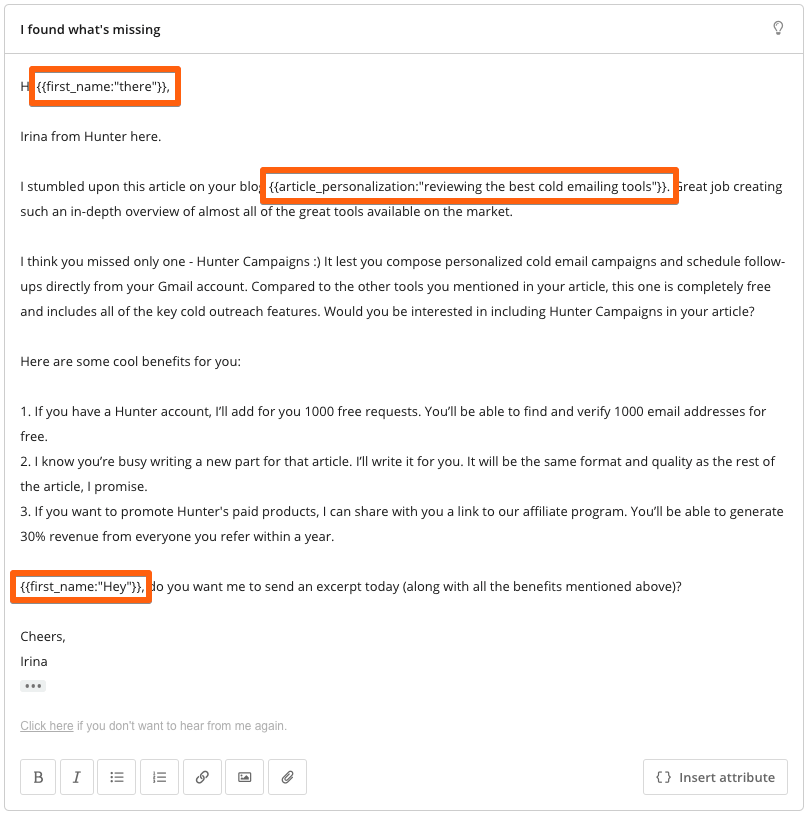
Before you start, be sure to check our directory of best-performing cold email templates. Feel free to grab one and adjust it to your needs.
Add links, images, or additional formatting if you’d like. Decide whether you want to include an unsubscribe link, track opens, and clicks.
I strongly recommend adding an unsubscribe link to each email you send. Sure, it won’t look natural, and some of your leads will realize that the message is a part of automation. But if you give them a relevant, personalized offer that adds value to their business, they won’t mind.
On the other hand, by letting people unsubscribe, you avoid situations where many people report your messages as spam. Having them leave via an unsubscribe link is much better for your email deliverability.
How Can You Send Personalized Emails?
Personalization of cold emails is a deep topic but one with potentially big rewards when you do a mail merge in Gmail. If you can find a way to connect to another person through an email, you’ll have a much easier time convincing them to work with you.
It’s not enough to insert their name in the first line. You want to learn more about them from the information available on the web and use it to your advantage.
Let’s stay with the conference theme. Say you’re searching for companies willing to pay you to be featured at that big Python conference you’re holding next quarter. You will, of course, research who the decision-makers in the company are and find their email addresses with Email Finder. You’ll also check their LinkedIn profiles and see the social media channels of their company.
Perhaps two of their engineers gave a talk at a local Python meetup in their town. It wouldn’t hurt to mention that in an email and suggest joining your conference as well, which happens to be much bigger with a much better audience and all sorts of benefits.
Maybe the lead in question attended a conference that you or someone from your team also took part in. It’s also a good conversation starter, for example:
“Hi {{first_name:”there”}},
I saw you attended [[conference]] last year, so did I! I guess we didn’t have a chance to meet, but it seems we’re both interested in [topic]. Just so it happens, we’re organizing a Python conference…”
Each recipient values different aspects differently. For example, you shouldn’t send an identical offer to each of the contacts at this specific conference. It’s better to dig a bit deeper and give them something they’re much more likely to accept.
Some will have no budget but can contribute a valuable speaker. Others won’t attend but also won’t mind paying to have their logo featured at the event. Someone else won’t even respond to you, at least not until they find out that their biggest rival is giving a keynote at the event.
The subject line also plays a big part in someone’s decision on whether they should open your email or not. It’s also an excellent idea to use mail merge there. Learn how to do it right and grab some inspiration from our collection of effective cold email subject lines.
4. Add follow-ups.
To properly nurture your leads, you probably want to follow up on those who won’t respond.
With Hunter Sequences, you can set up automated and personalized email follow-ups that will be sent at the scheduled time if no reply is recorded. You may choose to send them as a reply to the original email or a completely new message.
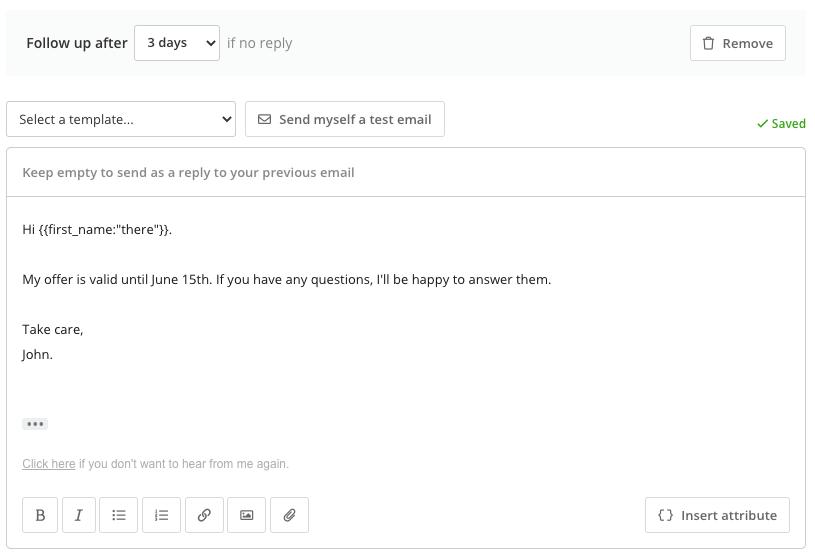
The standard approach by creating and email template and adding all the necessary attributes. Add any links, attachments files, or formatting as you’d like, but try not to overdo it; heavy emails often face deliverability problems.
We recommend scheduling up to three follow-up emails.
Need email template for inspiration? Check our guide to follow-up emails and grab one of the ready-to-use subject line templates.
5. Add contacts to Hunter Sequences.
Now that the email campaign is ready, it’s time to add the contacts. Make sure that at this point, the table with contacts features all the attribute fields used in the email template, whether you have them in Hunter Leads or in an external source.
Click Next and then + Add people. You have three options for adding your contacts. If none works for you, you can pull them via Zapier or Hunter API.
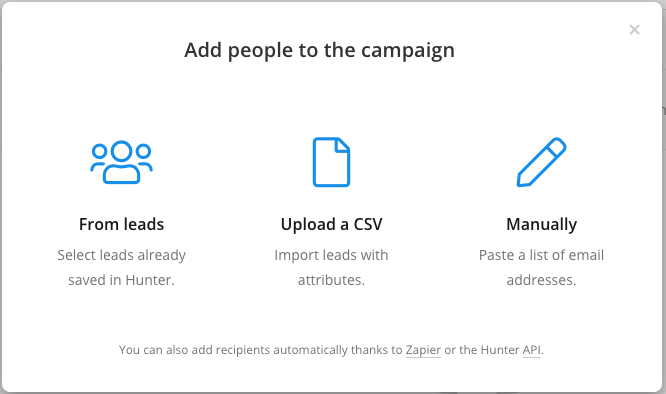
If you wish to mail merge Google Docs, export the contacts as CSV and import them to Hunter Sequences.
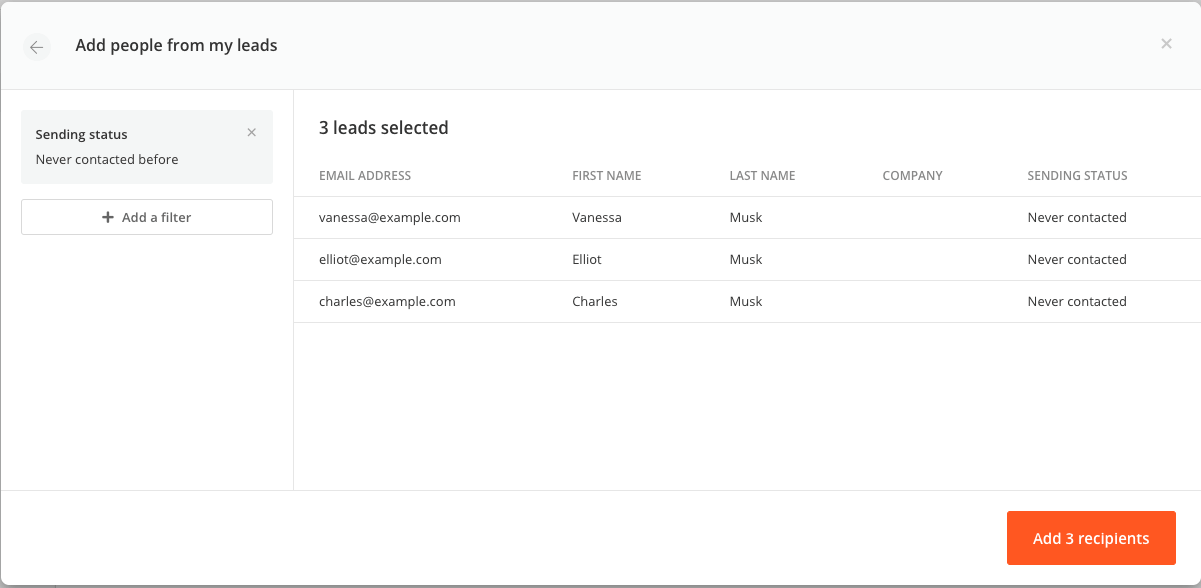
I have three wonderful contacts in Hunter Leads, so I choose this option. Then, I click Add 3 recipients.
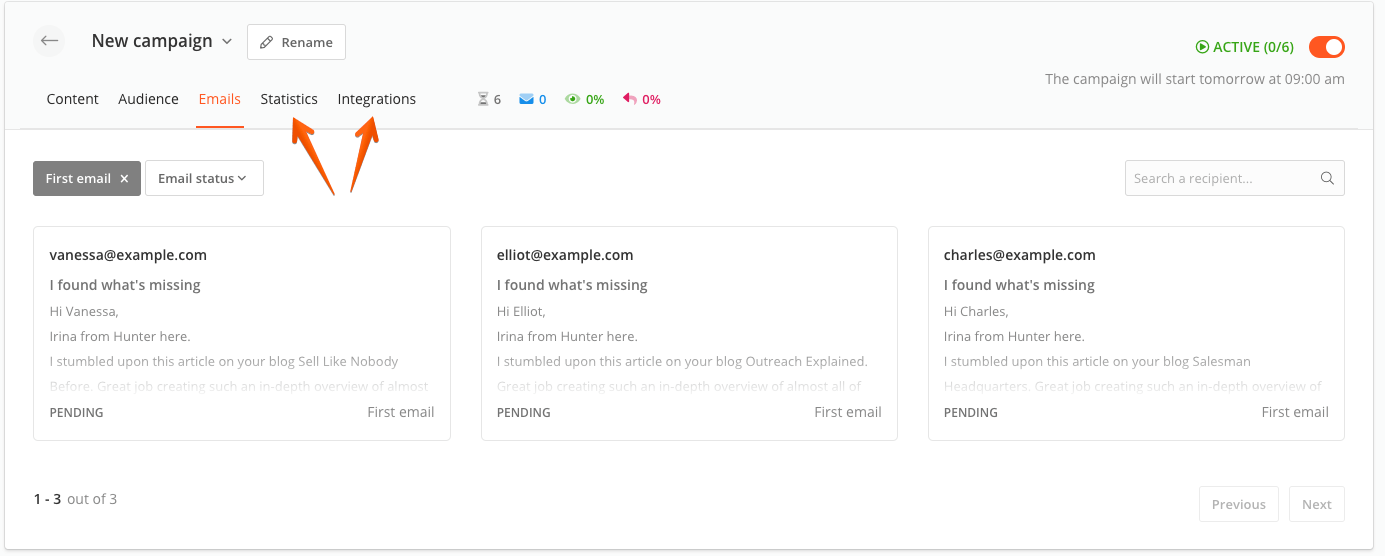
6. Review emails.
Once the contacts are loaded, you’re taken to the final stage. Here, you can see the preview of emails about to be sent with their individual attributes.
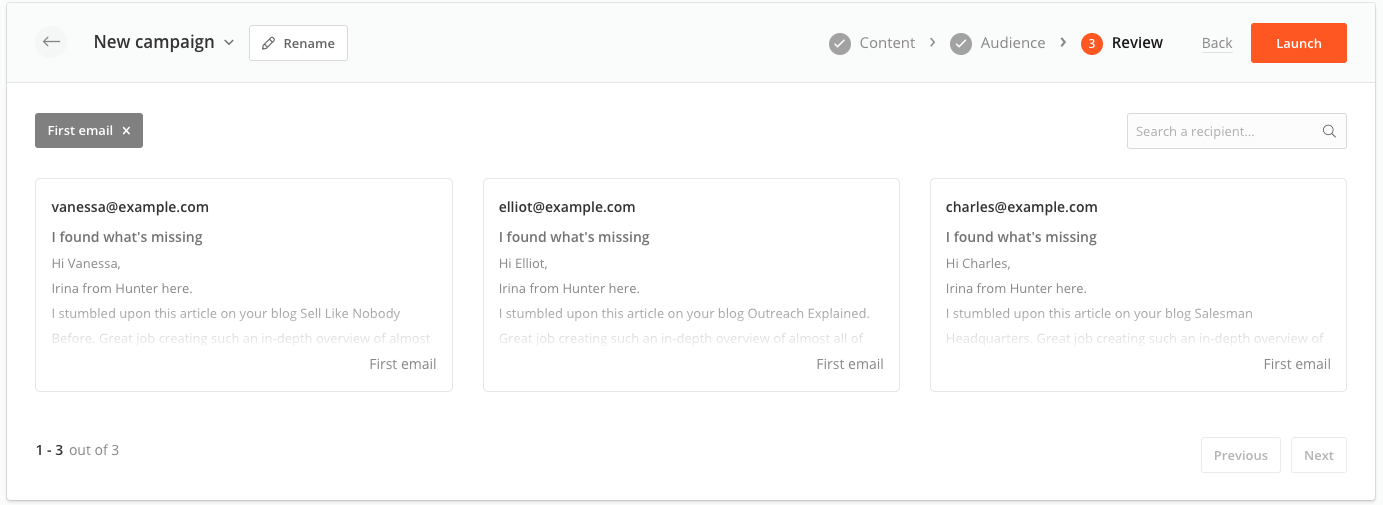
This is the time to run one final check. Suppose you see any general issue, for example, a fallback text that doesn’t look natural. It’s better to jump back to the Content section and fix it for all emails.
If you want to edit a particular email, it’s better to do it manually from this screen. Click on a message in question, and the editor will load. Then, make any changes you want and click Save.
Schedule Emails And Send
The last stage is to click the Launch button and then Set the campaign as active.
The email will be queued for sending and will be despatched in the previously selected sending window at the chosen interval.
At any point, you can look up the detailed statistics of the campaign. You can download them as a CSV file. If you jump to the Leads section again, you’ll see the current status for each lead to which you have sent an email.

You may also connect Zapier or use webhooks to perform a specific action when someone replies (for example, a record is added to your CRM). Find both options in the integrations menu.
When the replies come, you’ll see them directly in your Gmail inbox. You can continue each conversation there as you usually do. When you’re ready to send the new campaign, load your contacts to the existing campaign or create a new one following the steps I described above.
Note: Hunter Sequences now supports Outlook integration. You can follow the same steps to do an Outlook mail merge. Alternatively, you can check this guide on how to send mass email in Outlook.
Gmail mail merge—Recap
That’s about all on how to do a mail merge in Gmail. As you can see, the process is very simple and straightforward.
The beauty of using Hunter Sequences for sending emails is that you’ve got all the tools you need in one place so that you can come with a list of companies you want to target. You’ll find real emails of decision-makers in these companies; you’ll verify them, customize the emails to your liking, and send the automated campaigns with follow-ups.


 Send cold emails with Hunter