
If you want to get new customers, the easiest thing to do is to wait for them to come to you. However, this isn’t always the most effective approach.
Outbound sales takes a proactive approach to selling by reaching out to potential customers first.
In this guide, we’ll provide you with a step-by-step process on how to get started with outbound sales and keep new customers coming in every month.
What is outbound sales?
Outbound sales is a selling process where a sales rep reaches out to a prospect by calling them on the phone, sending an email, messaging the prospect through a social media platform, or by any other means.
This is opposed to an inbound sales process, where buyers themselves initiate the conversations.
Benefits of outbound sales
Wondering why you should implement an outbound sales process? It allows you to:
Target your ideal customers
With inbound sales, you’ll have various types of prospects initiating conversations with your team. A lot of those will potentially not be a good fit for your solution.
With outbound sales, on the other hand, sales reps can hand-pick prospects who fit their criteria for ideal customers and only engage with those types of prospects.
Generate revenue predictably
Once you have a proven outbound sales process in place, all you need to do to generate more revenue is to add more prospects to your list. With outbound sales, you’re only limited by the total number of prospects that exist in your target market.
Automate the sales process
A large part of the outbound sales process can be automated, either fully or to a certain extent.
This includes everything from building lists and identifying prospects’ contact details to sending automated email sequences or leaving voicemail drops.
How to get started with outbound sales
Now that you understand what an outbound sales process is and why you should implement it, let’s look at how you can get started with outbound sales.
Create an ideal customer profile (ICP)
The first step to getting started with outbound sales is to create an ideal customer profile (ICP). This is a representation of a company that would be an ideal fit for your solution.
By understanding your ICP, you’ll be able to identify suitable prospects to reach out to. Here’s how to create an ideal customer profile:
Identify your best customers
Start by identifying your best customers: those who have been with you the longest and generated the most revenue for your company. When comparing customers, focus on metrics like customer lifetime value, retention rate, and average life span.
Perform customer interviews
Once you’ve identified your top customers, interview them to learn more about their pain points, needs, and preferences. Specifically, you’ll want to find out:
- What challenges they’re dealing with
- What they look for in a solution like yours
- What their purchasing process looks like
- Which factors influence their decision
Analyze the data
Then, you’ll want to analyze the data you’ve collected from the interviews and try to find similarities between your top customers. These similarities will help form the basis of your ICP.
For example, you might find out that your best customers are all enterprise companies in one specific industry. Or, you might discover that your top customers are small businesses located in a specific geographical region.
Build a profile
Finally, put all your findings into a document and flesh out your ideal customer profile. You’ll want to include the following information in your ICP document:
- Company size
- Industry
- Annual revenue
- Goals and objectives
- Pain points and challenges
- Common objections or hurdles
Build a prospect list
Once you’ve created an ideal customer profile, it’s time to use it to build your prospect list.
There are a lot of different ways to approach outbound prospecting, but in this guide, I’m going to cover two:
Use Hunter Discover
Discover is Hunter's B2B database. It's free to use for every Hunter user, and it can help you find thousands of relevant companies in minutes.
To start, head to Discover and take a look at the available filters.
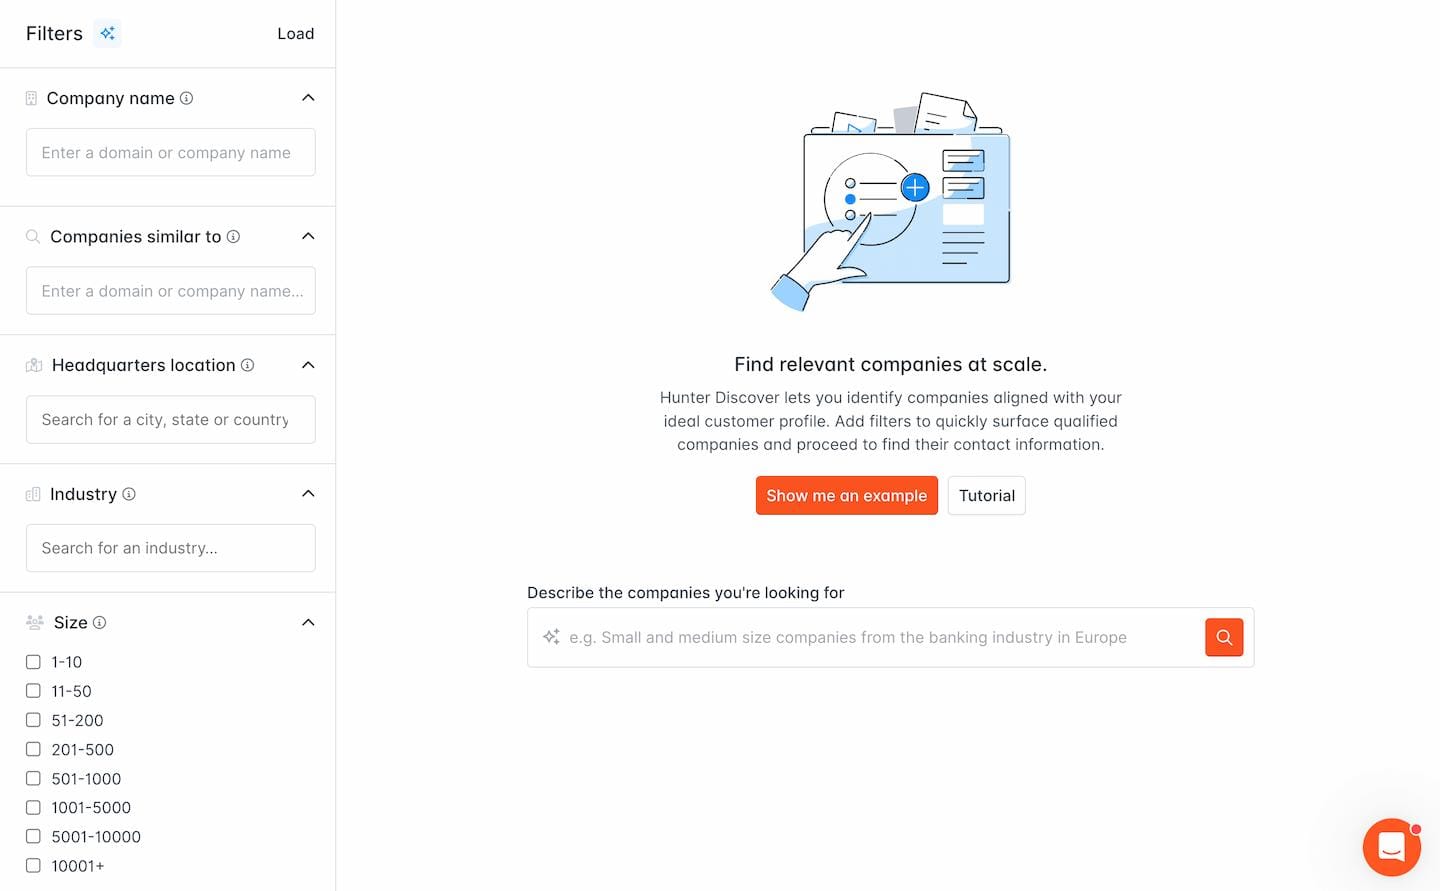
Your objective here is to match the available data variables with the attributes of your ideal customer profile.
If you're not sure how to start, use the AI Assistant–you can give it an unstructured description of your ICP, and it will aim to translate it into relevant filters.
Once you have your search configured, review the results and check if they're indeed a match. Refine your search until you're satisfied.
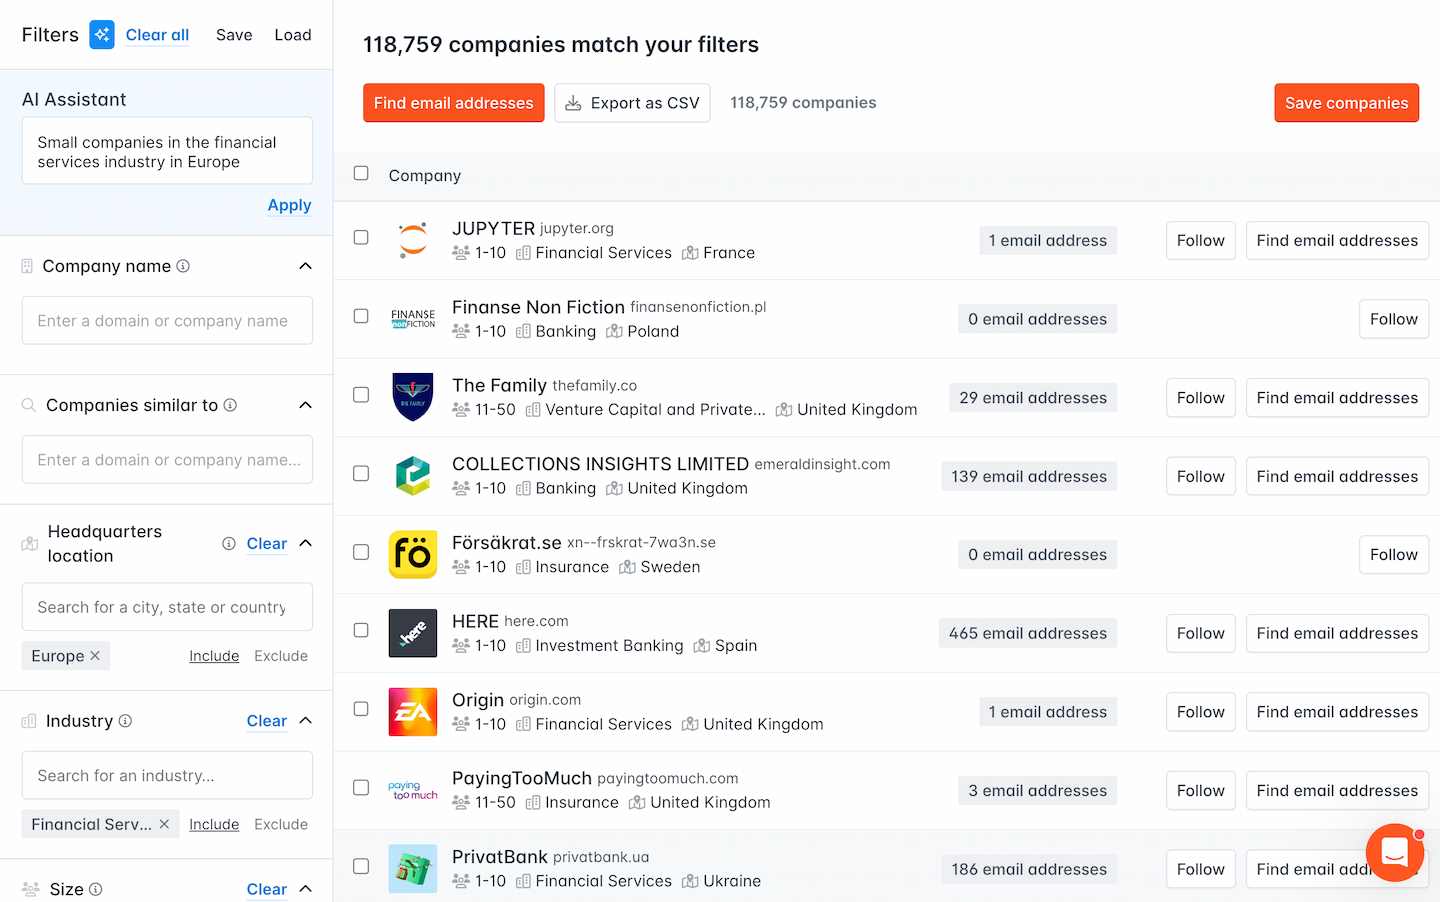
You can click on listed companies to learn more about them, or even find email addresses to use in your outreach directly inside Discover.

At the final step, select companies matching your ICP in bulk and click on "Find email addresses." Using this feature, you'll find email addresses associated with the companies, and you'll be able to save them as Leads in Hunter.
Use LinkedIn Sales Navigator
You can use a free LinkedIn account to build a basic prospect list by simply using the platform’s search feature. Check out this post to learn more about doing that.
In this guide, however, I’m going to show you how to build a list of prospects that fit your ideal customer profile perfectly by using the advanced filters and functionality available in LinkedIn’s Sales Navigator plans.
First, start by going to the LinkedIn Sales Navigator dashboard. From there, use the Account filters to search for companies that fit your ICP.
For example, let’s say that you work as an outbound sales rep for a restaurant automation software company. Your ICP are US restaurant chains making $10M+ in annual revenue.
Here’s how to find companies that fit your ICP using the filters available in Sales Navigator:
- Set the Annual revenue filter to $10M+
- In the Headquarters location section, choose United States
- Finally, select Restaurants using the Industry filter
You’ll then be provided with a list of all the companies that fit your target criteria. Save these companies to an account list.

Then, switch over to the Lead filters tab. Here, you’re going to fill out details about decision-makers at your target companies.
In our example, these are going to be Chief Technology Officers and Directors and VPs of Information Technology or IT Infrastructure.
Sales Navigator gives you quite a few filters to help you find just the right contacts you need. You can filter contacts by job function, title, seniority, current or past company, profile language, and more.
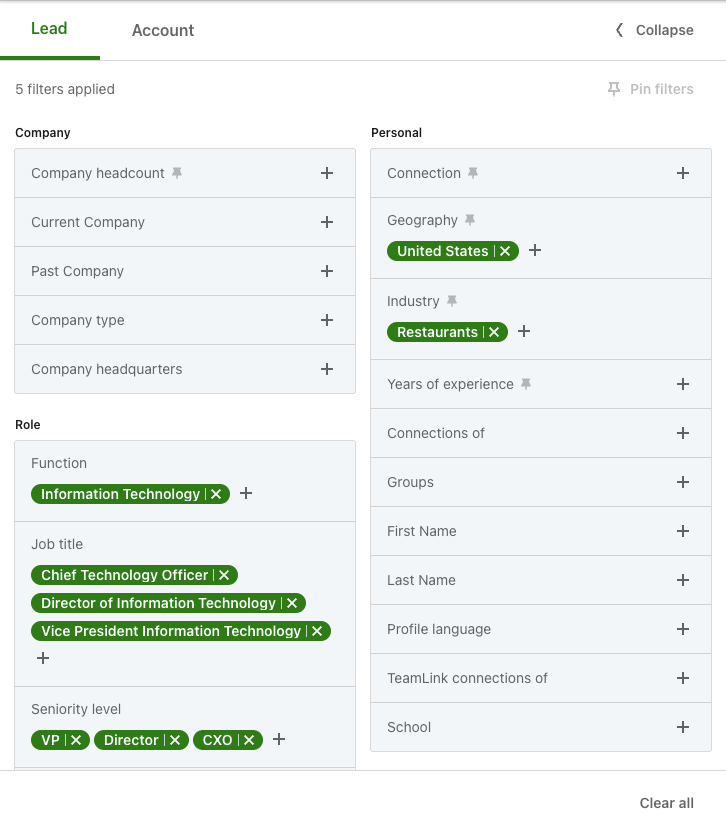
Once you make the appropriate selections there, you’ll want to scroll down to the Workflows section and choose your account list under Account lists.
This will ensure that all the contacts displayed actually work at your target accounts.
From here, you can select contacts and add them to a lead list by clicking the Save to list button. You can access all your lead lists by clicking on Leads in the header menu.
When accessing your list, you can click the three little dots next to a contact’s name to connect with them or send them a message. Unfortunately, LinkedIn doesn’t provide you with access to the contact’s email address.
To get access to email addresses for contacts on your list, you can use Hunter’s Email Finder. Simply go to the Email Finder page, enter the person’s name and website, and you’ll get their email address in seconds.
Decide which outbound channels you’re going to use
You have your prospect list ready. Now it’s time to reach out.
Before you can do that, however, you need to decide which outreach channels you’re going to use. A few popular options include:
Reaching out to prospects through email should be a mainstay tactic in your outbound sales strategy.
Why? Because it’s free, scalable, and easily automated.
Email is also something everyone checks on a daily basis (even multiple times a day), which gives you plenty of opportunities to grab prospects’ attention.
Since it’s a business-oriented platform, LinkedIn is another logical place to reach out to prospects.
However, LinkedIn users aren’t particularly fond of sales pitches delivered through the platform, so it’s best to use LinkedIn to build rapport and develop a relationship with the prospect.
Phone
For some industries and products, it might make sense to reach out to prospects over the phone.
This is a far less popular tactic nowadays, and whether you should use it will depend on your offer and your target audience. If you’re reaching out directly to business owners, it can be a good idea.
Note that you don’t need to decide on just one of these outbound channels — you can use all of them as a part of your outbound sales cadence.
Plan a sales cadence
Most initial outreach messages don’t receive a reply. That’s why the best outbound sales professionals always follow up with a prospect multiple times.
The best way to organize your follow-ups is by creating a documented sales cadence, which is a series of contact attempts or interactions you’ll make with each prospect on your list.
The most successful outbound sales strategies take advantage of multiple channels (e.g., email and LinkedIn) to increase the chances of getting a reply from the prospect.
Again, which channels you’re going to use and how many outreach attempts you’ll make is up to you — there’s really no hard rule you should follow.
Below is an example of a multi-channel sales cadence that uses email, LinkedIn, and voicemail to try and reach prospects over a period of 4 weeks. Feel free to use it as shown or to inspire your own customized sales cadence.
- Day 1: Connect with the prospect on LinkedIn
- Day 3: Send a personalized cold email
- Day 7: Follow up on your email
- Day 10: Send a message on LinkedIn
- Day 14: Send a second follow-up email
- Day 21: Leave a voicemail message
Create a sales pitch
Once you’ve planned out a sales cadence, it’s time to create a sales pitch for your product or service. You’ll want to spend some time on it to make sure it really hits on your prospects’ pain points and makes them curious about your solution.
Follow these tips to create an effective sales pitch:
- Grab the prospect’s attention with a hook – The first line of your sales pitch needs to grab prospects’ attention and make them want to read or listen to your entire sales pitch. A good approach here is to address their pain point immediately.
- Provide context – Once you’ve hooked them with the first line of your sales pitch, you’ll want to provide more context by explaining who you are, what types of customers you work with, and how you can help solve their pain points.
- Use data – Try to add hard data that proves the claims you make within your sales pitch. This will show the prospect that you’re not just making empty promises.
- Create a sense of urgency – To make prospects act on your offer as soon as possible, explain to them why it’s urgent to address the pain points they’re dealing with.
- End with a call-to-action – End your sales pitch with a call-to-action that lets prospects know what you want them to do next (e.g., schedule a call, book a demo, etc.)
Automate your outbound sales process
The most time-intensive part of any outbound sales process, if done manually, will be the sending of cold emails and following up on them. However, there’s no reason to do this manually when solutions like Hunter Sequences exist.
Hunter Sequences is an all-in-one cold email outreach tool that enables you to send personalized emails to prospects on autopilot and schedule follow-ups to be sent automatically at predefined intervals.
Here’s how you can set up an automated cold email campaign using Hunter Sequences:
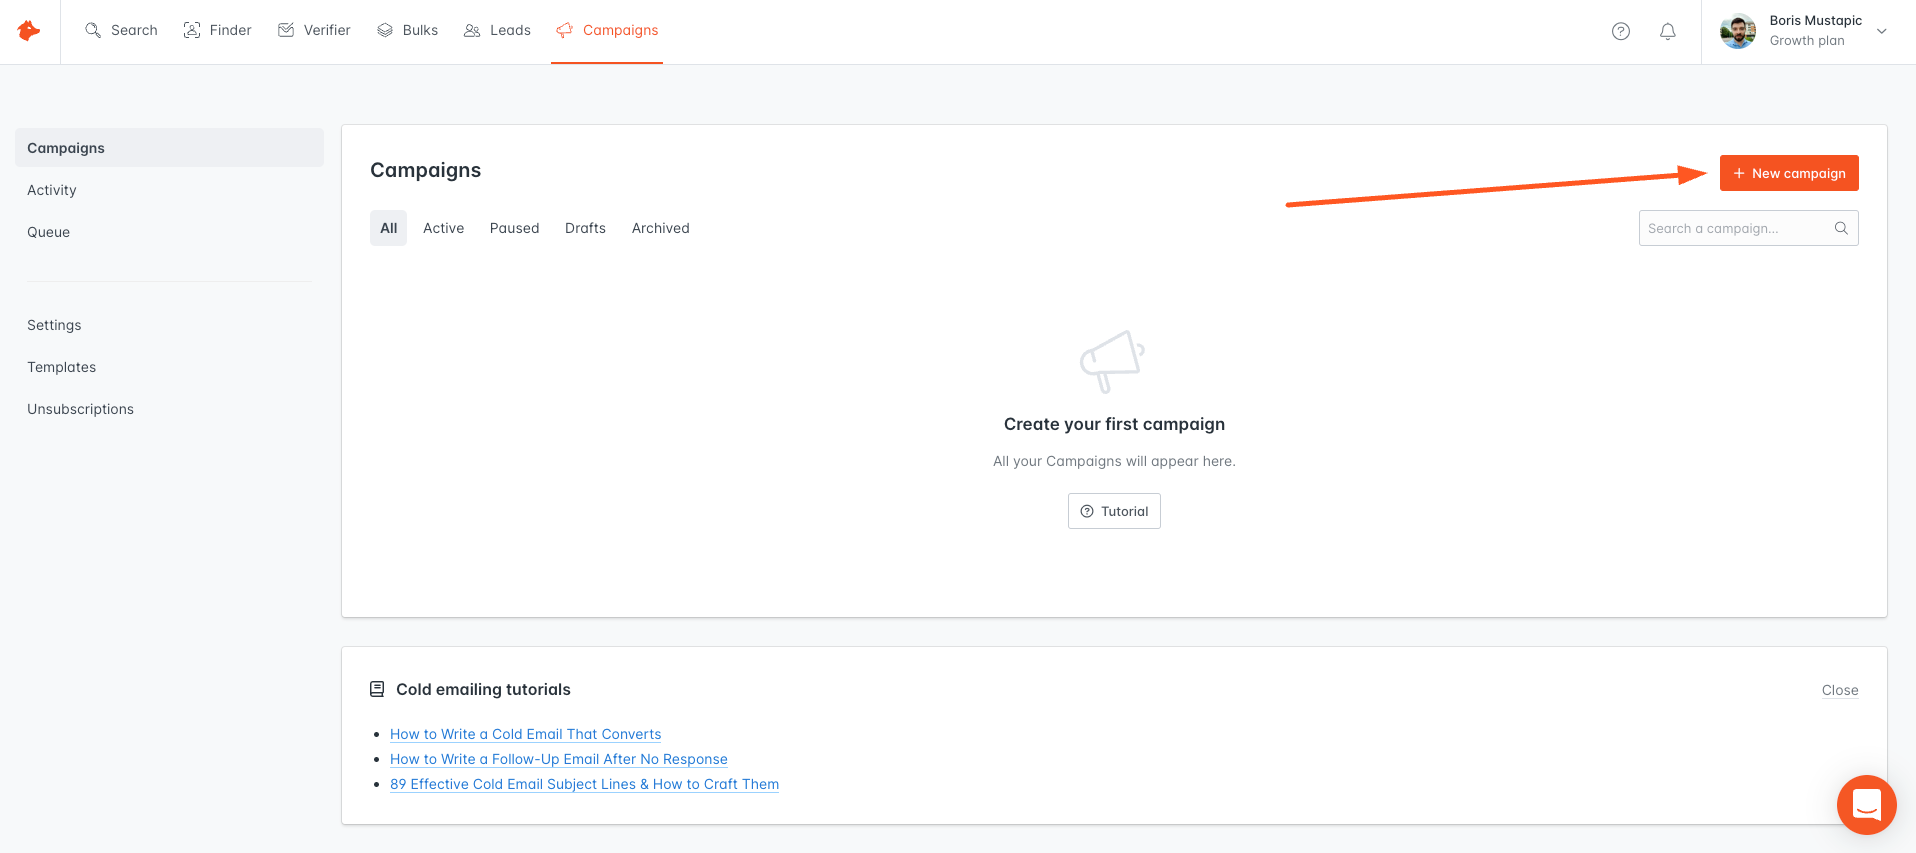
Log in to your Hunter account, and go to the Sequences tab. Click the +New campaign button to create a new campaign.
If you haven’t connected an email account already, Hunter will prompt you to do so. Once that’s done, you can move on to adding the first email in your sequence.
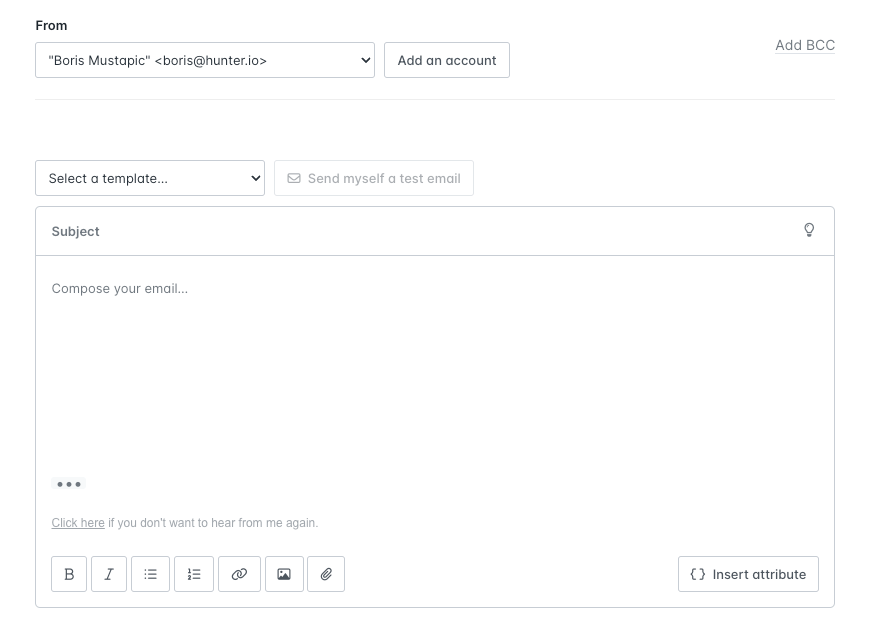
Here, you’ll want to add a subject line for your cold email. Remember, a good subject line is crucial for improving open rates, so spend a bit of time here to get it just right.
Then, add the copy for your cold email. If you need help writing an effective cold email, check out this post.
Hunter Sequences allows you to personalize your emails automatically for each prospect through custom attributes. Simply click the {} Insert attribute button and choose from the list of built-in attributes.
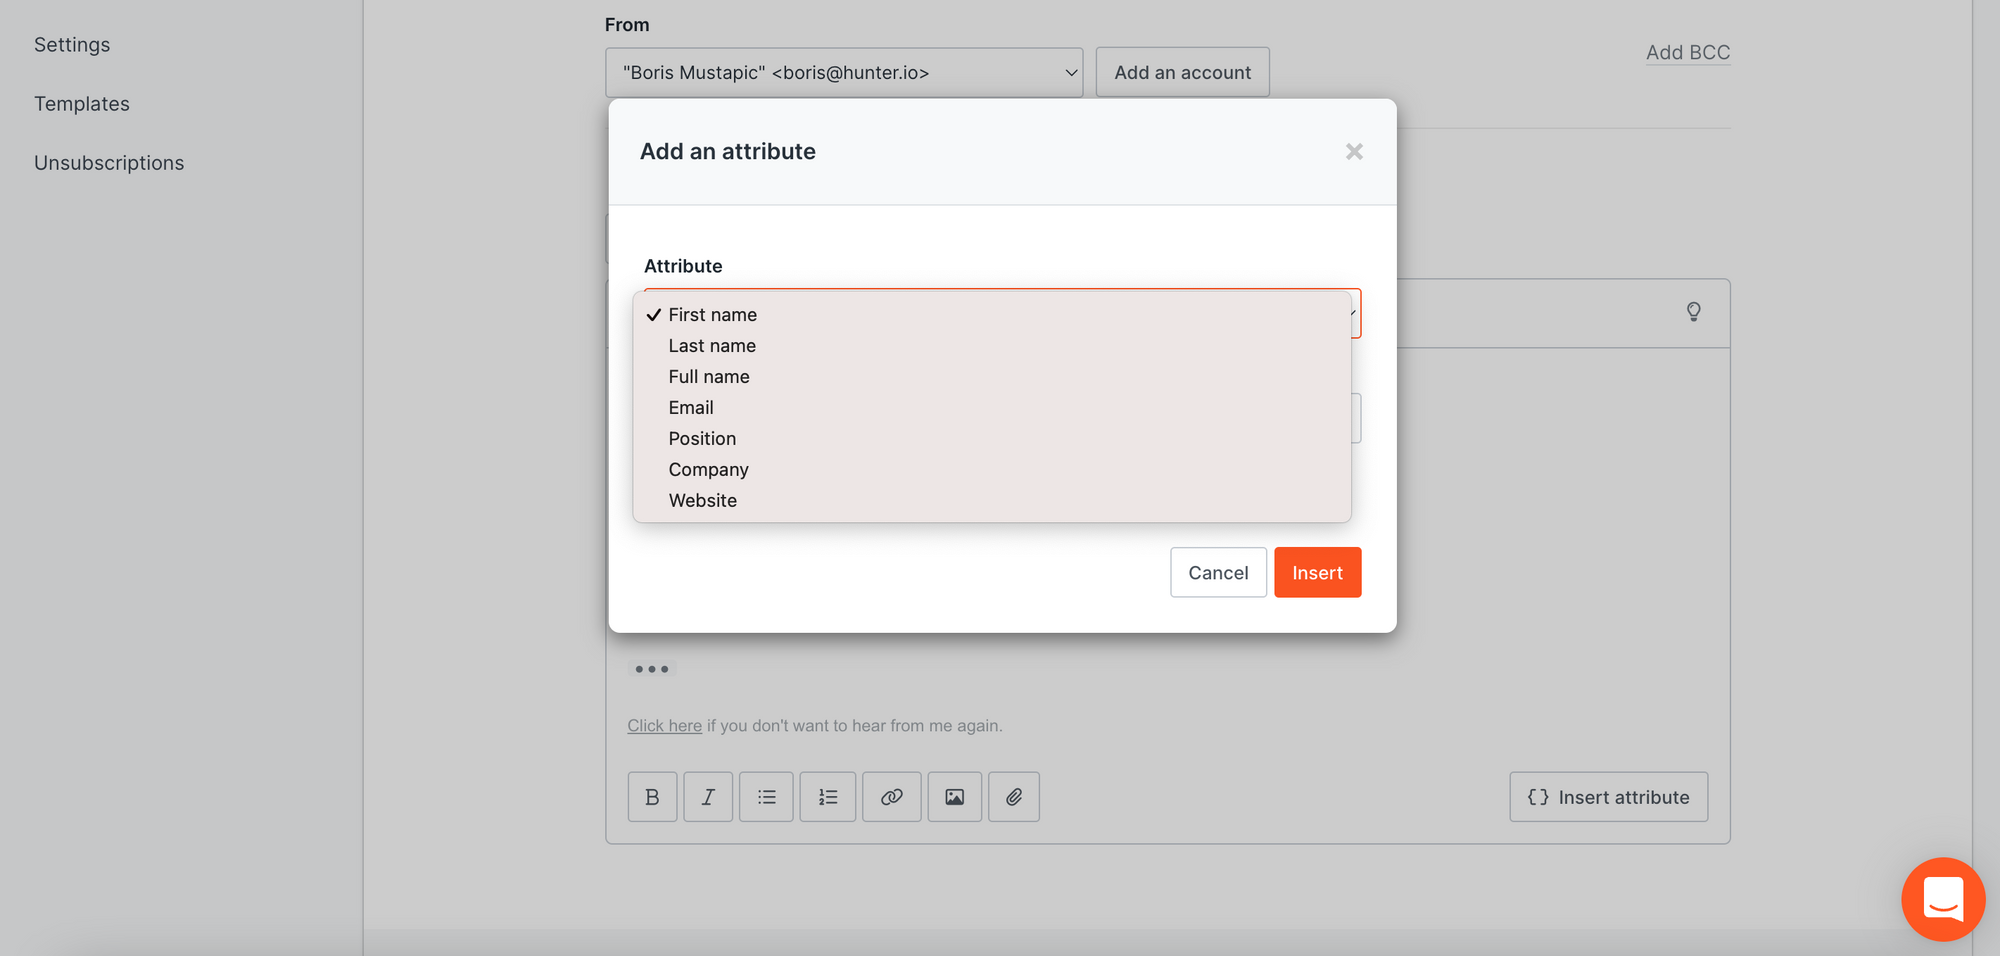
If you want to add custom attributes, go to the Leads tab and click on the Custom attributes link in the left-hand menu.
Hunter Sequences allows you to add up to three follow-up emails to your cold email sequence. To add a follow-up email, click the Add a follow-up button.
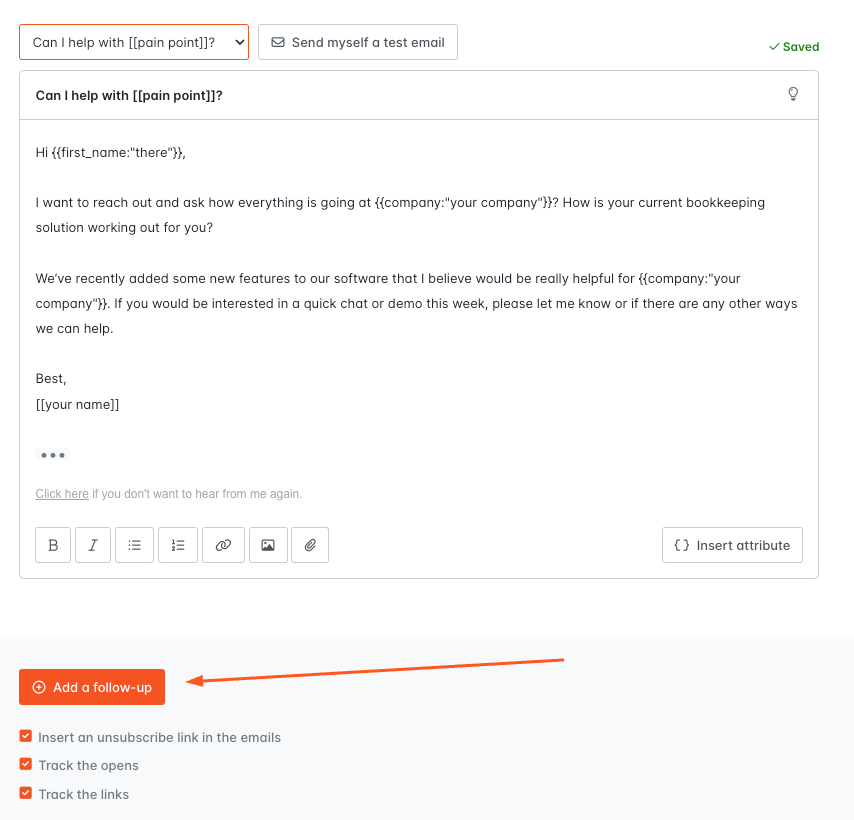
Then, add the copy for your follow-up email. Leave the subject line field empty if you’d like to send the follow-up in the same thread as your original email.
Once you’re happy with your email sequence, click the Next button.
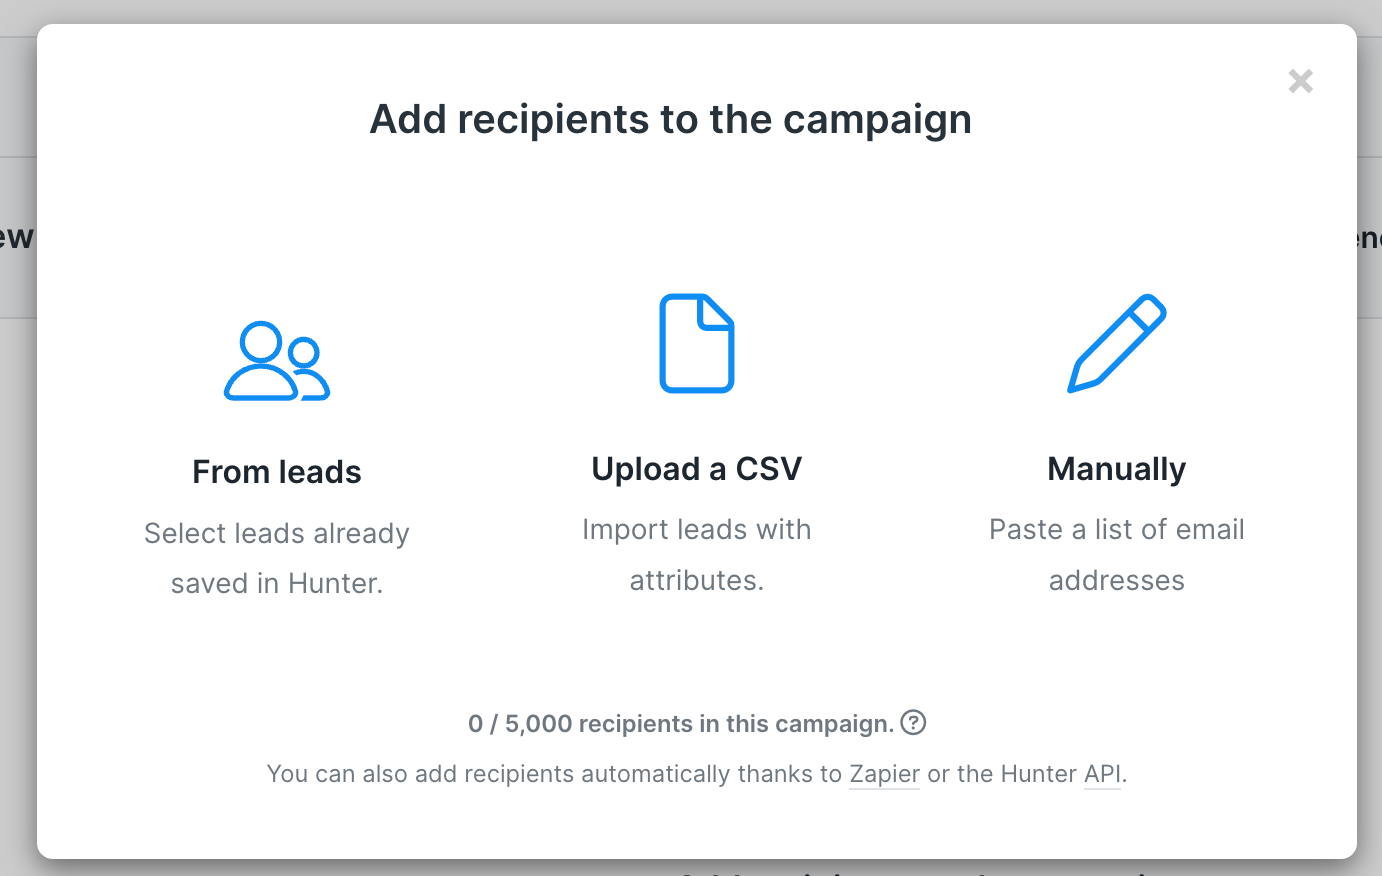
On the next screen, click Add recipients to the campaign and upload your prospect list. Click Next.
At this point, you’ll be able to set the sending window for your campaign, as well as add a custom unsubscribe sentence. Once you’re happy with the settings, click Next.
Review your campaign one more time. If everything looks good, click the Launch button to start your campaign.
Track performance
How will you know if you’re using an effective outbound sales strategy if you don’t track your performance?
It’s crucial to track the performance of your outbound sales activities to understand how you’re doing and whether you might need to implement some changes to your process.
Which metrics and key performance indicators (KPIs) you’re going to track will depend on your team, process, and goals. With that said, almost every outbound sales team will benefit from tracking these metrics:
- Number of emails sent and number of phone calls made – Outbound sales is largely a numbers game. You’ll want to track how many outreach attempts your team is making and perhaps even set some goals based on this metric.
- Net new opportunities – Denotes how many new opportunities your sales team generates in a given period.
- Close rate – This one’s obvious, and it’s something every sales team should track. The close rate is the percentage of opportunities that turn into closed deals.
- Projected pipeline sales value – Shows the projected value of deals in your sales pipeline.
- New business revenue – You’ll also want to track just how much revenue you’re generating from your outbound sales activities.
Keep your pipeline full with an effective outbound sales process
Having an effective outbound sales process will ensure your pipeline stays full at all times. To recap, here are the steps you need to take to build an effective outbound sales system:
- Create an ideal customer profile
- Build a prospect list
- Decide which outbound channels you’re going to use
- Plan a sales cadence
- Create a sales pitch
- Automate your outbound sales process
- Track performance
Finally, remember that you don’t need to choose between inbound and outbound sales — these two different approaches can co-exist as long as you have the team resources to support them.
Now go out there and start selling!


 Send cold emails with Hunter