Meet the new Leads: the easiest way to organize and explore your data in Hunter
As your leads grow, you need a simple way to manage them. Whether segmenting your ICP, sending follow-ups to engaged recipients, or enriching your CRM, lists are central to it all. But more lists create complexity, clutter, and demands on your time.
That’s why our latest update simplifies the way you build and manage your lists, giving greater visibility into your saved People and Companies so that you can scale your outreach while taking less time building the lists that power them.
TL;DR
Great outreach is built on well-organized lists. The more targeted your lists are, the better your opens, replies, and conversions. So, we're making it easier to reduce the time on that task with the following tools within Hunter:
- Static lists: A fixed snapshot, great for one-off campaigns. People and Companies move in and out of this when when you manually make that change.
- Dynamic lists: Smart lists that are built from filters. These can be created from any Static List, and are live lists that change over time based on your filters.
- Folders: Organize your lists in a lightweight manner to easily find lists
- List management hub: One location to access, organize, and manage lists
- All People and Company views: Default views where every person or company you've saved can be found, whether they belong to a list or not.
- Data across multiple lists: People and companies can exist across multiple lists at the same time without the need to duplicate the record.
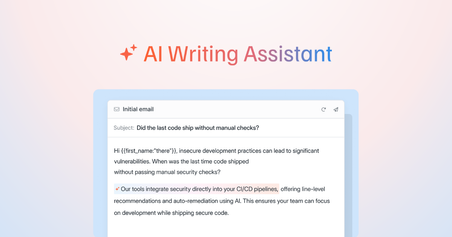
Here's how that looks in action:
Log in or create your free account to try the easiest way to manage your data in Leads
Want to learn more? Read on.
What's changing?
We’re introducing new tools within Leads to help you easily organize and access your data:
- New ways to build lists: Create fixed lists of People or Companies using Static Lists, or try new Dynamic Lists that automatically populate based on your filters, like engagement or companies with recent funding.
- Easily organize your lists: Add folders to group your lists, for instance, by industry or campaign, and view them all within the new list management hub.
- See all your prospects: Quickly access and search through all your saved data without having to assign them to lists with the new “All People” and “All Companies” views.
Even better, your People and Companies can now exist in multiple lists simultaneously without duplication.
Why are we making this change?
This follows our May 2025 improvements to finding decision makers and our broader focus on your productivity in Hunter.
These changes give you more control and visibility over your data. For anyone who manages thousands of leads or needs an easier way to access their Leads or Companies, this is going to help you in countless ways.
Want to set up an automatic list email openers from your campaign? You can.
Want to group lists under a campaign, vertical, or attribute, like technologies? You can.
Want to see every Person or Company that you’ve prospected to avoid duplication? You can.
How to use the new organization tools
Organizing data is central to every action you want to take. Here are some examples of how you can see instant value from this update.
1. How to build a Dynamic list
Dynamic lists are going to save a lot of time. That’s because you’re going to be able to create a list based on a Discover search, for instance, and see that list grow over time.
This works great when you have a campaign you’re running to a specific segment of your Ideal Customer Profile (ICP).
Let’s say my ICP are US HVAC companies. I want to run a campaign for CEOs. Here’s how we do that.
Creating our Dynamic list
- If you need to find Leads from scratch, do so by using Discover, Email Finder, Email Verifier, or Domain Search. All the Leads will be added into the new “All people” view.
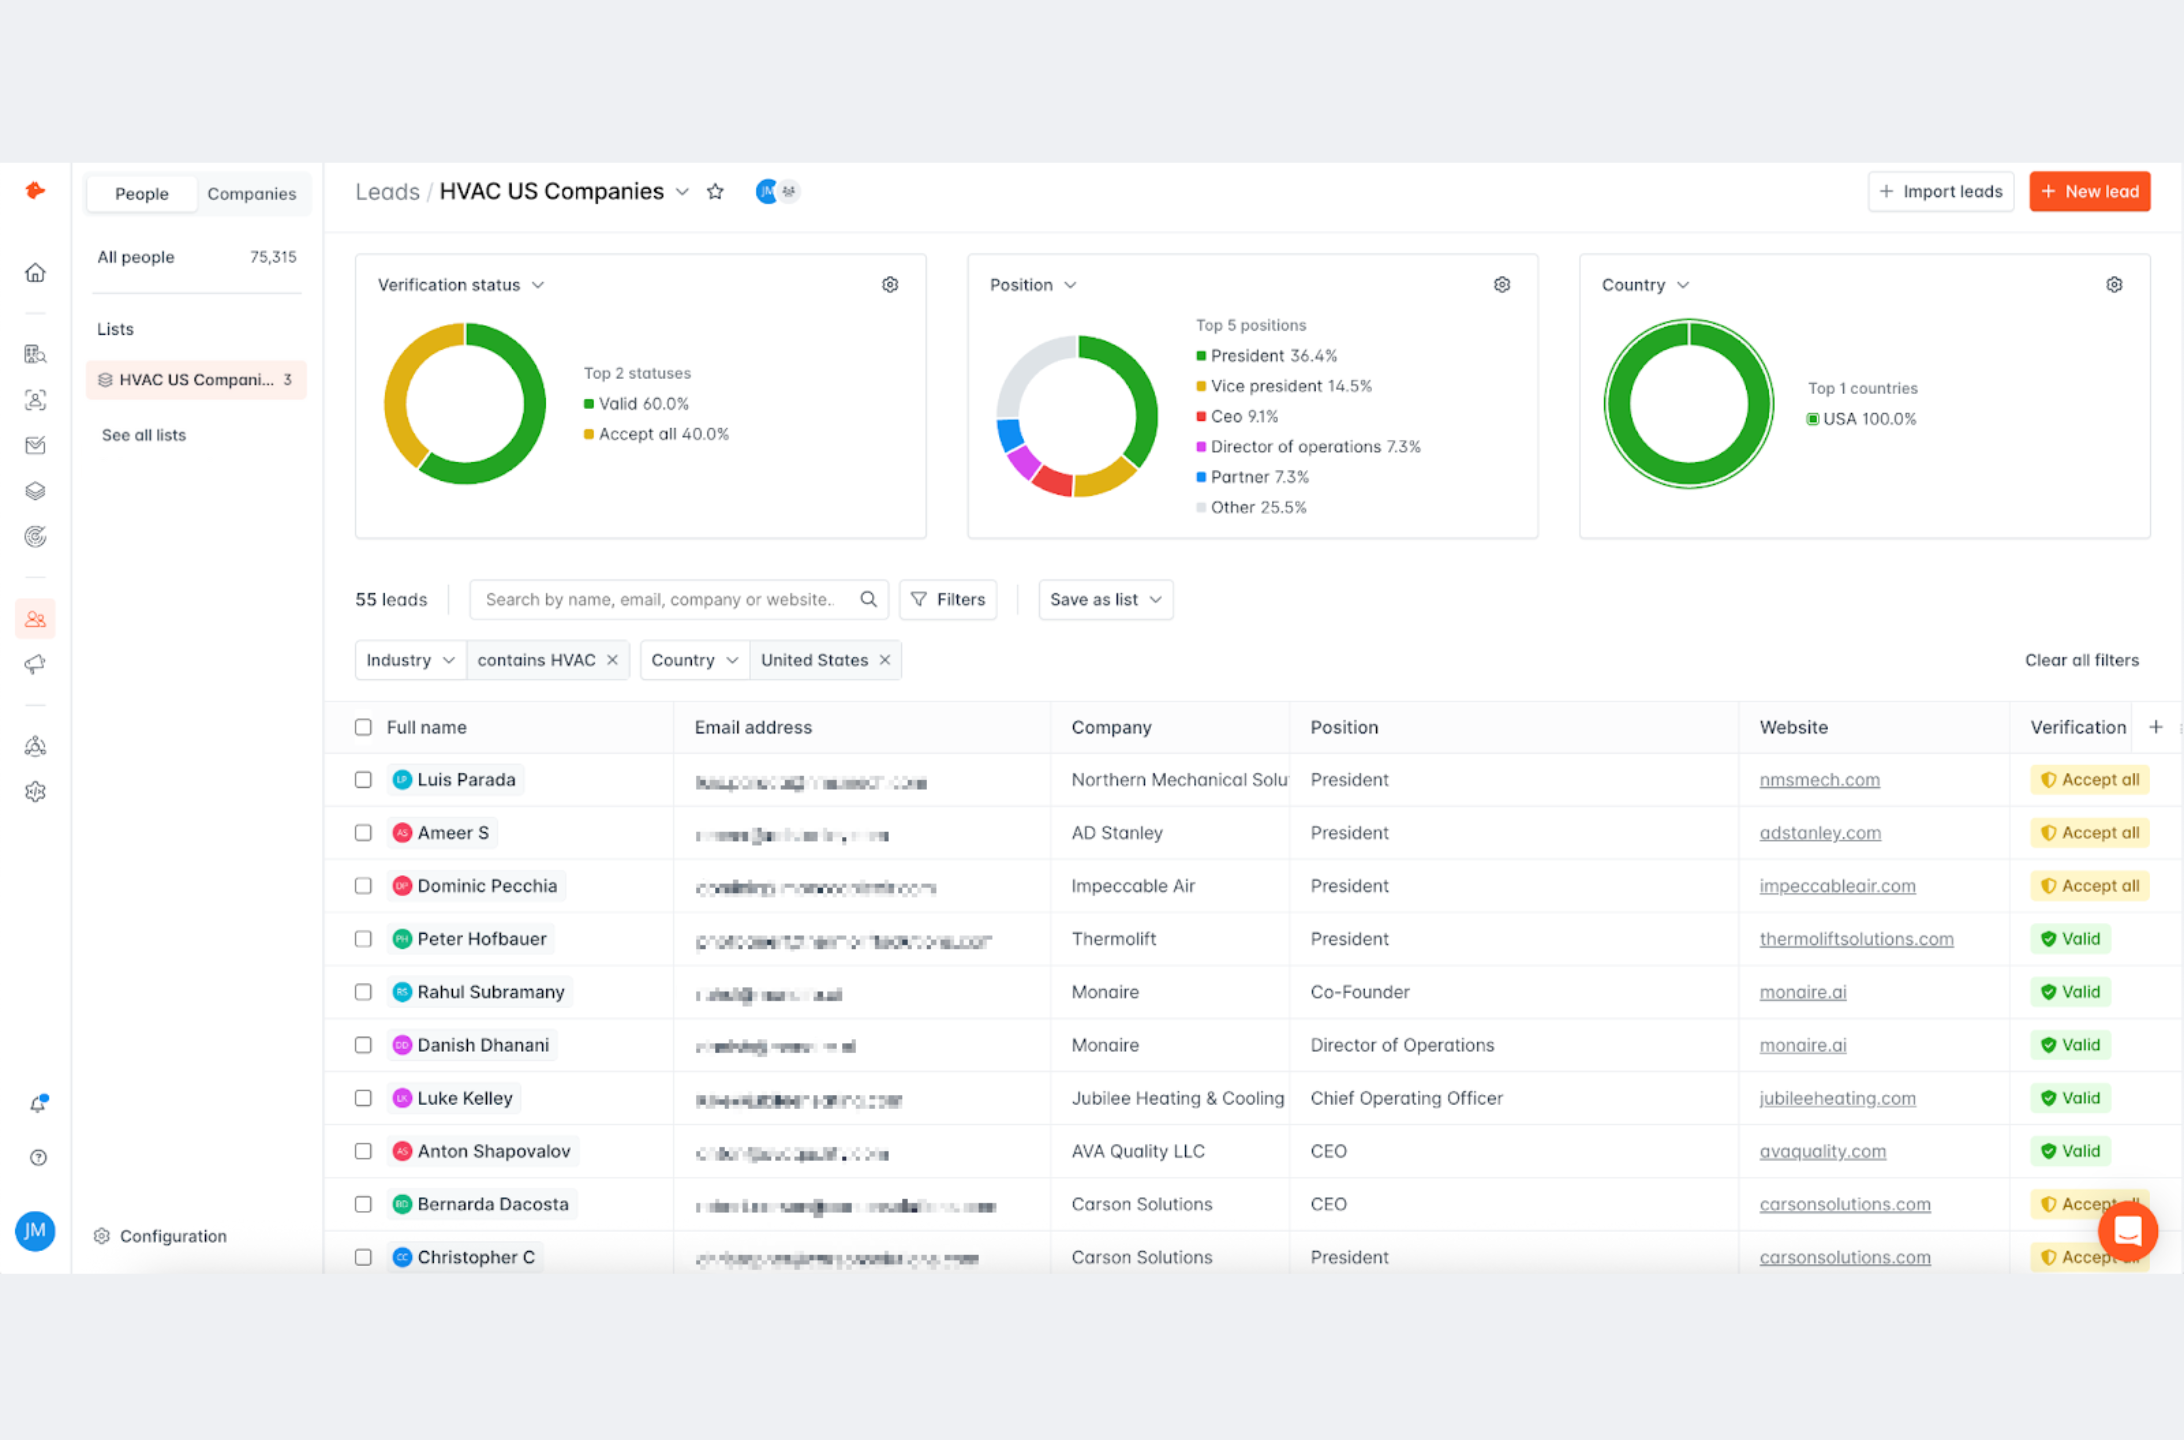
- Visit your Leads and choose “All people” - and add two filters, Industry>Contains>”HVAC”, and “Country”>”United States”.
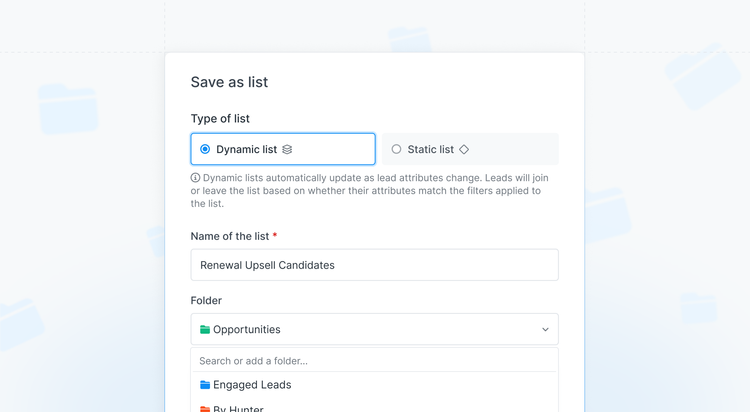
- Select your leads from the results, and then select “Save as list.”
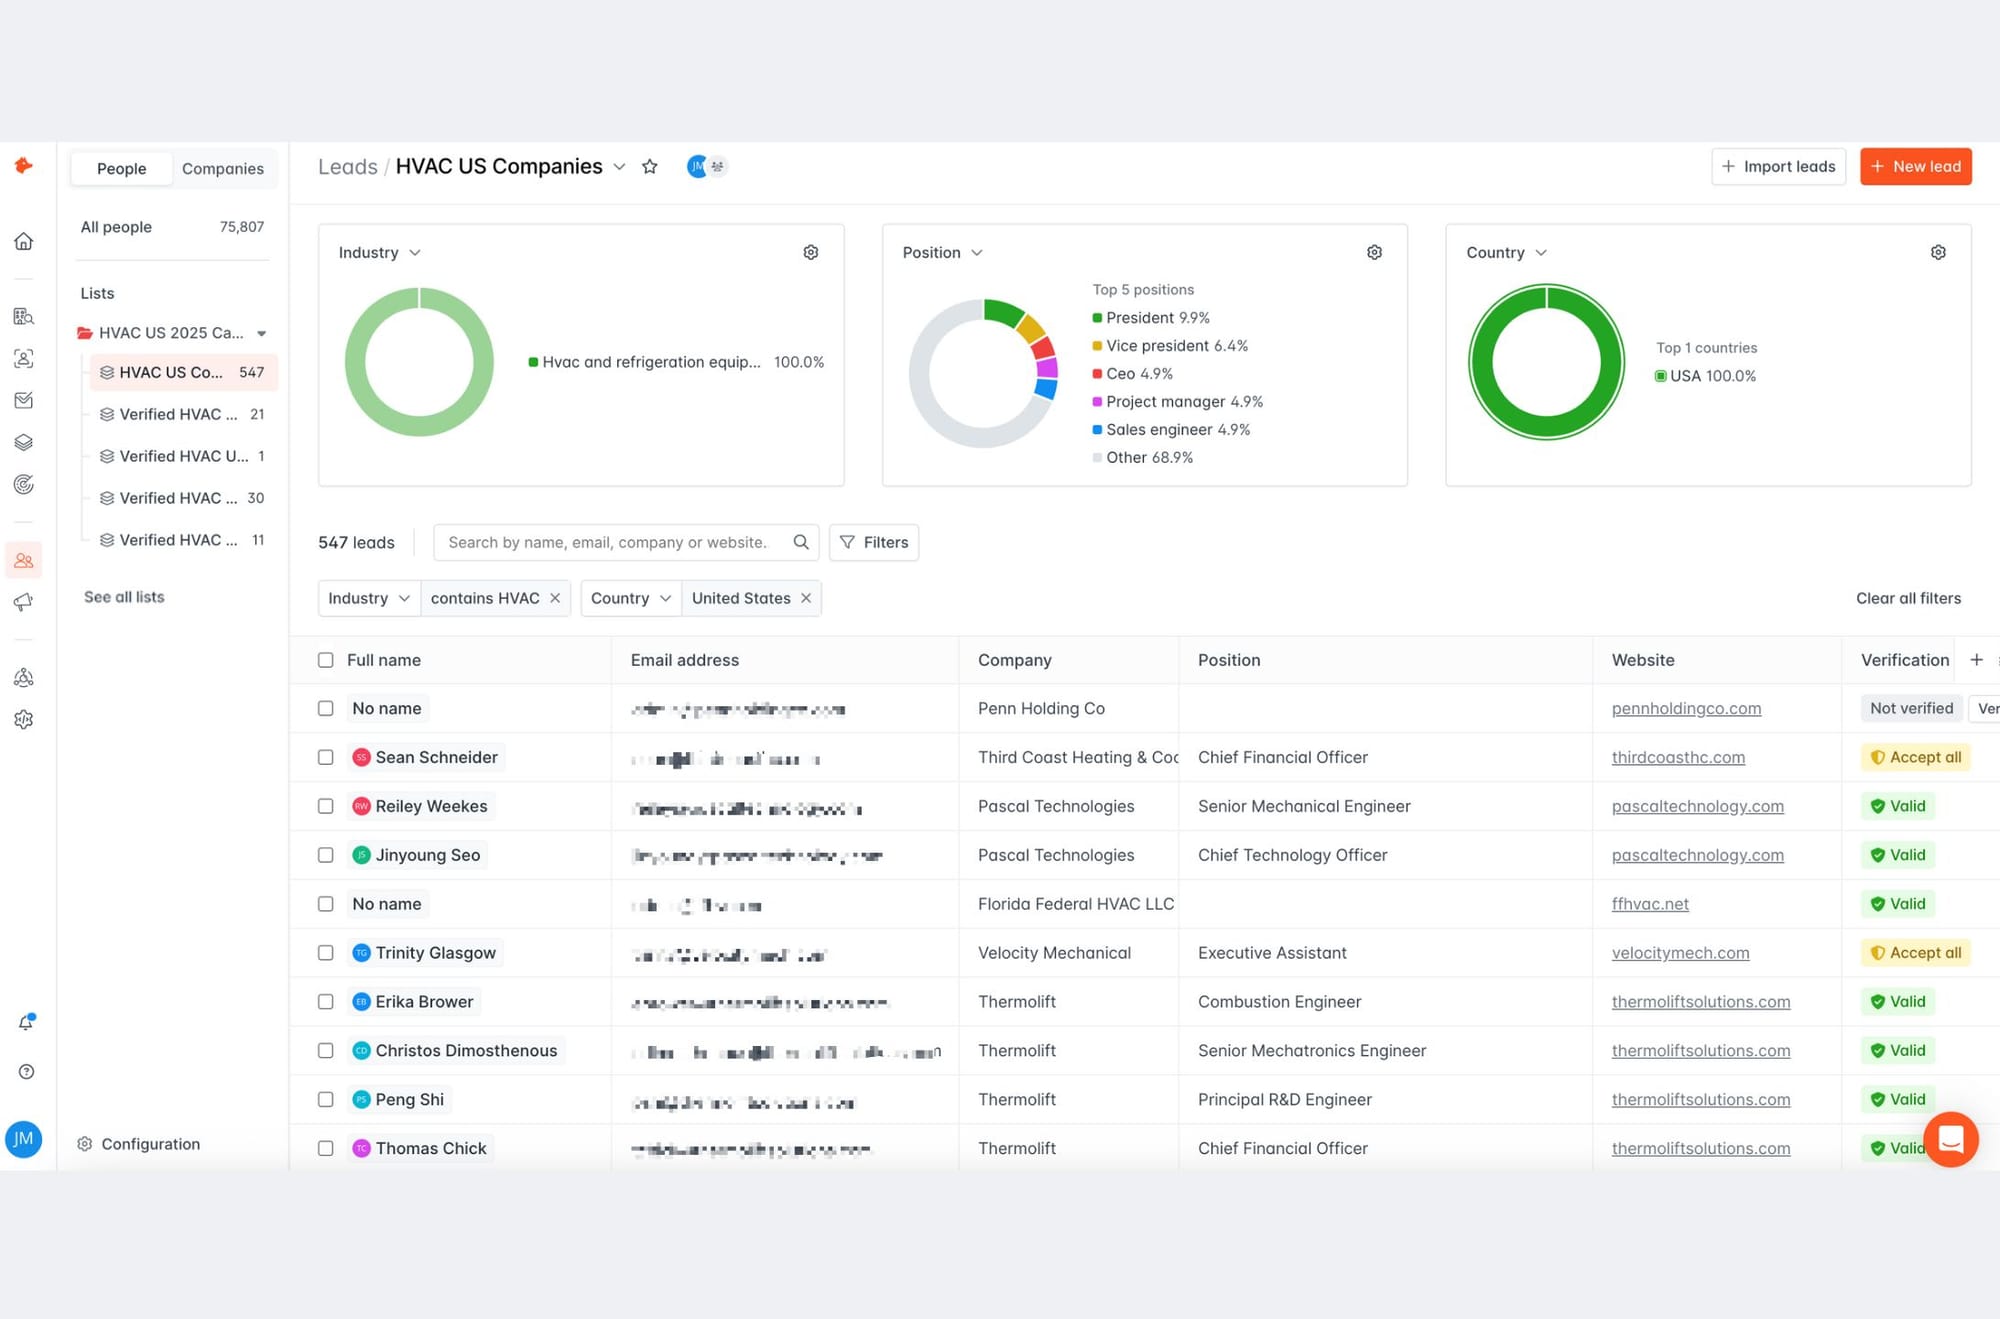
- You can save this as a Dynamic or Static list. We’ll choose Dynamic and name it “HVAC US Companies”
- In the resulting folder, we see all leads for HVAC companies in our list that are already saved in our database. Our list sits at 55 leads.
Now we have our first list. But what if we want to add more Leads automatically?
Adding people in the future
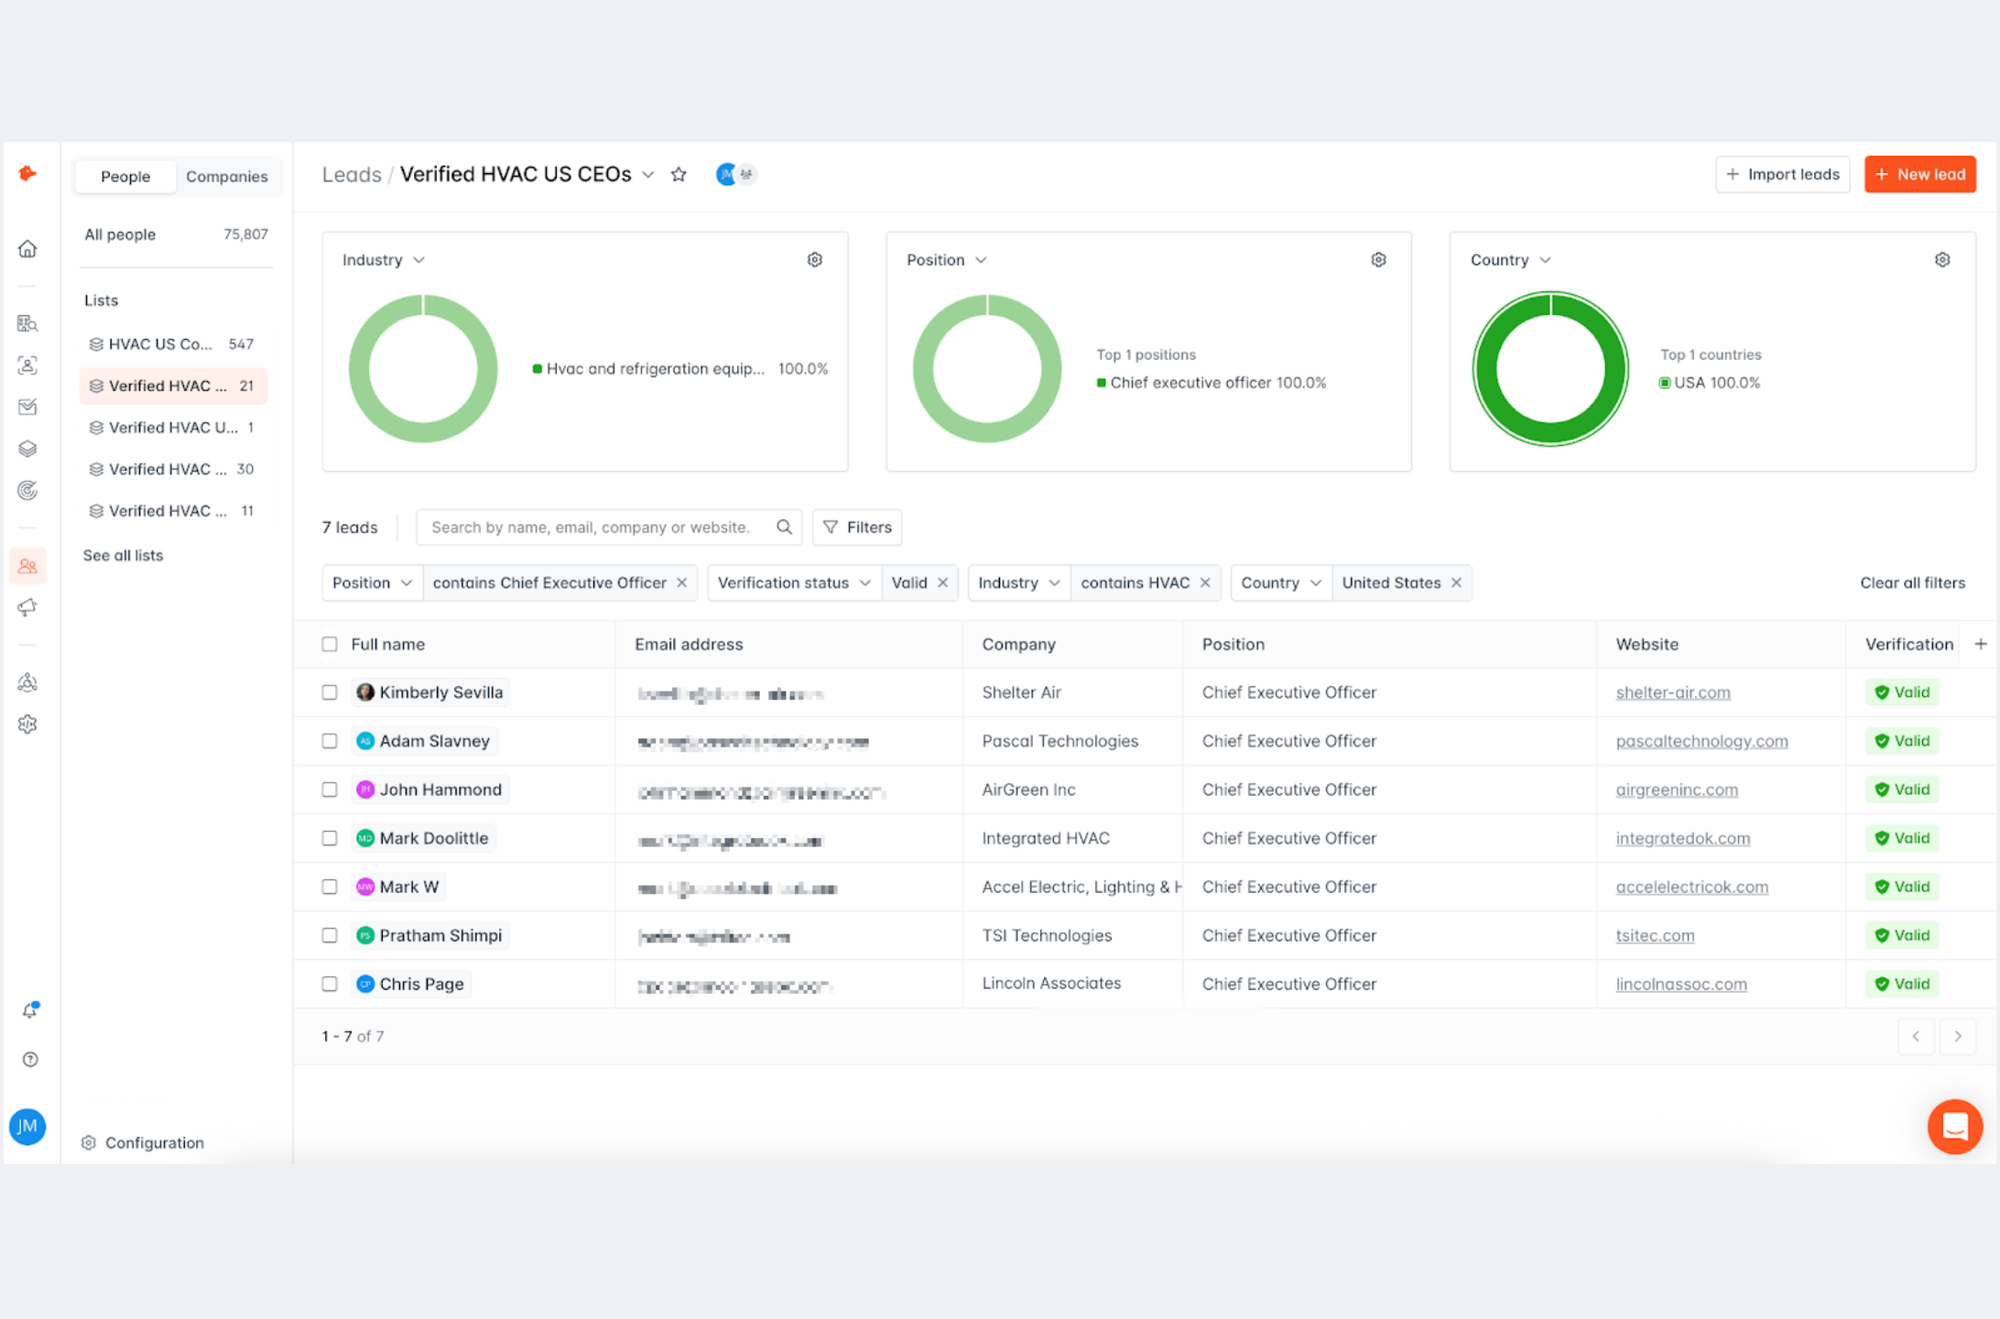
Let’s say we now only want CEOs with a verified email. Let’s create another dynamic list from this “HVAC US Companies list.”
- In our “HVAC US Companies" list we add a new filter for Position and another for Verification Status
- Now we click “Save as list,” “Save as a new list,” choose Dynamic list, and save it as “Verified HVAC US CEOs.”
- That list shows 7 people, but it will now automatically populate with any new Leads you save that match your filters.
If we were to search for more leads in Executive role from a Discover search into “HVAC US Companies” or the “All people” view, for instance, the “Verified HVAC US CEOs” list will change if there are any more Chief Executive Officers to add.
Updating the Dynamic list
Our new search didn’t add enough new people, so we want to check if using “CEO” in the Position filter changes our results.
- We update the Position filter to “CEO.” This increase the count to 21
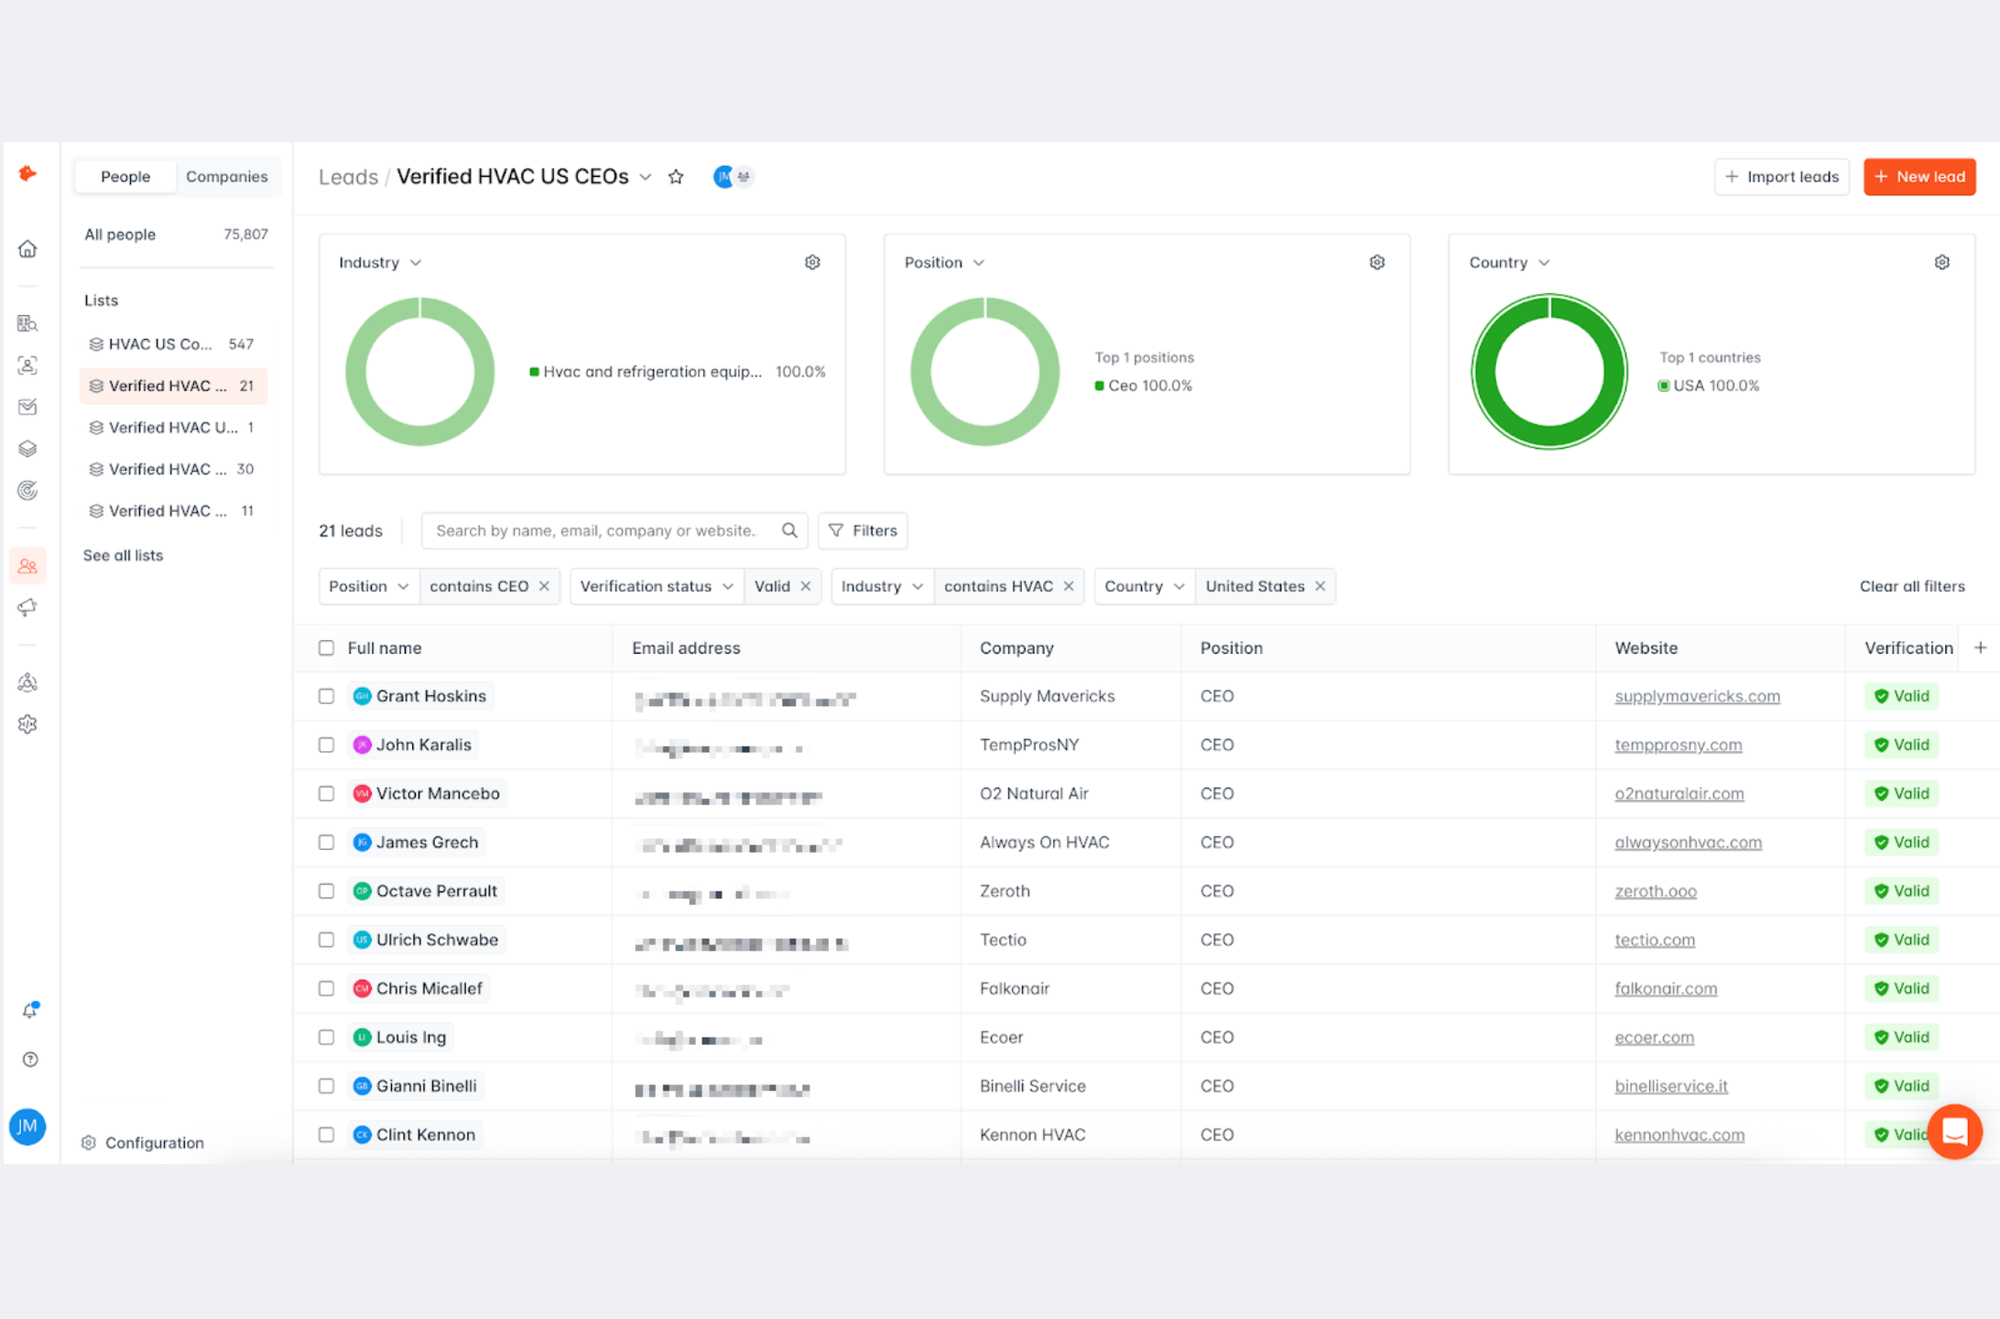
- To save those changes to this Dynamic list, we click “Save as list,” and choose “Update current list.”
And, before emailing these leads, you can create another Dynamic list based on “Email Status” as a filter to pre-populate a list of any Leads who reply.
This saves you time from manually moving Leads from one list to another, and creates an efficient process that you can run every month or week to feed your pipeline with new data.
2. How to organize our lists
Now that we’ve built out lists for CEOs, and added in more for CFOs, and COOs, we’ve got four lists for HVAC companies in the US, that need to be grouped for easy reference. Here’s how you do that:
- Create a consistent naming convention across the list. For us, our People lists for this US HVAC campaign will be “Verified HVAC US [POSITION]”. Add the position for each list.
- We can now see all of our lists grouped together, but not collected into one folder
- Adding a folder will help us to quickly spot the campaign. To create a folder, click “Lists” in the side panel, and click “+ New folder” in the top right corner.
- Name your folder. Here, we’ll name it “HVAC US 2025 Campaign,” and we’ll add a color to make it easier to spot - red
- We’ll then need to click against each list in the List view and then click “Add to a folder” in the toolbar at the top of the page, and choose our “HVAC US 2025 Campaign folder.
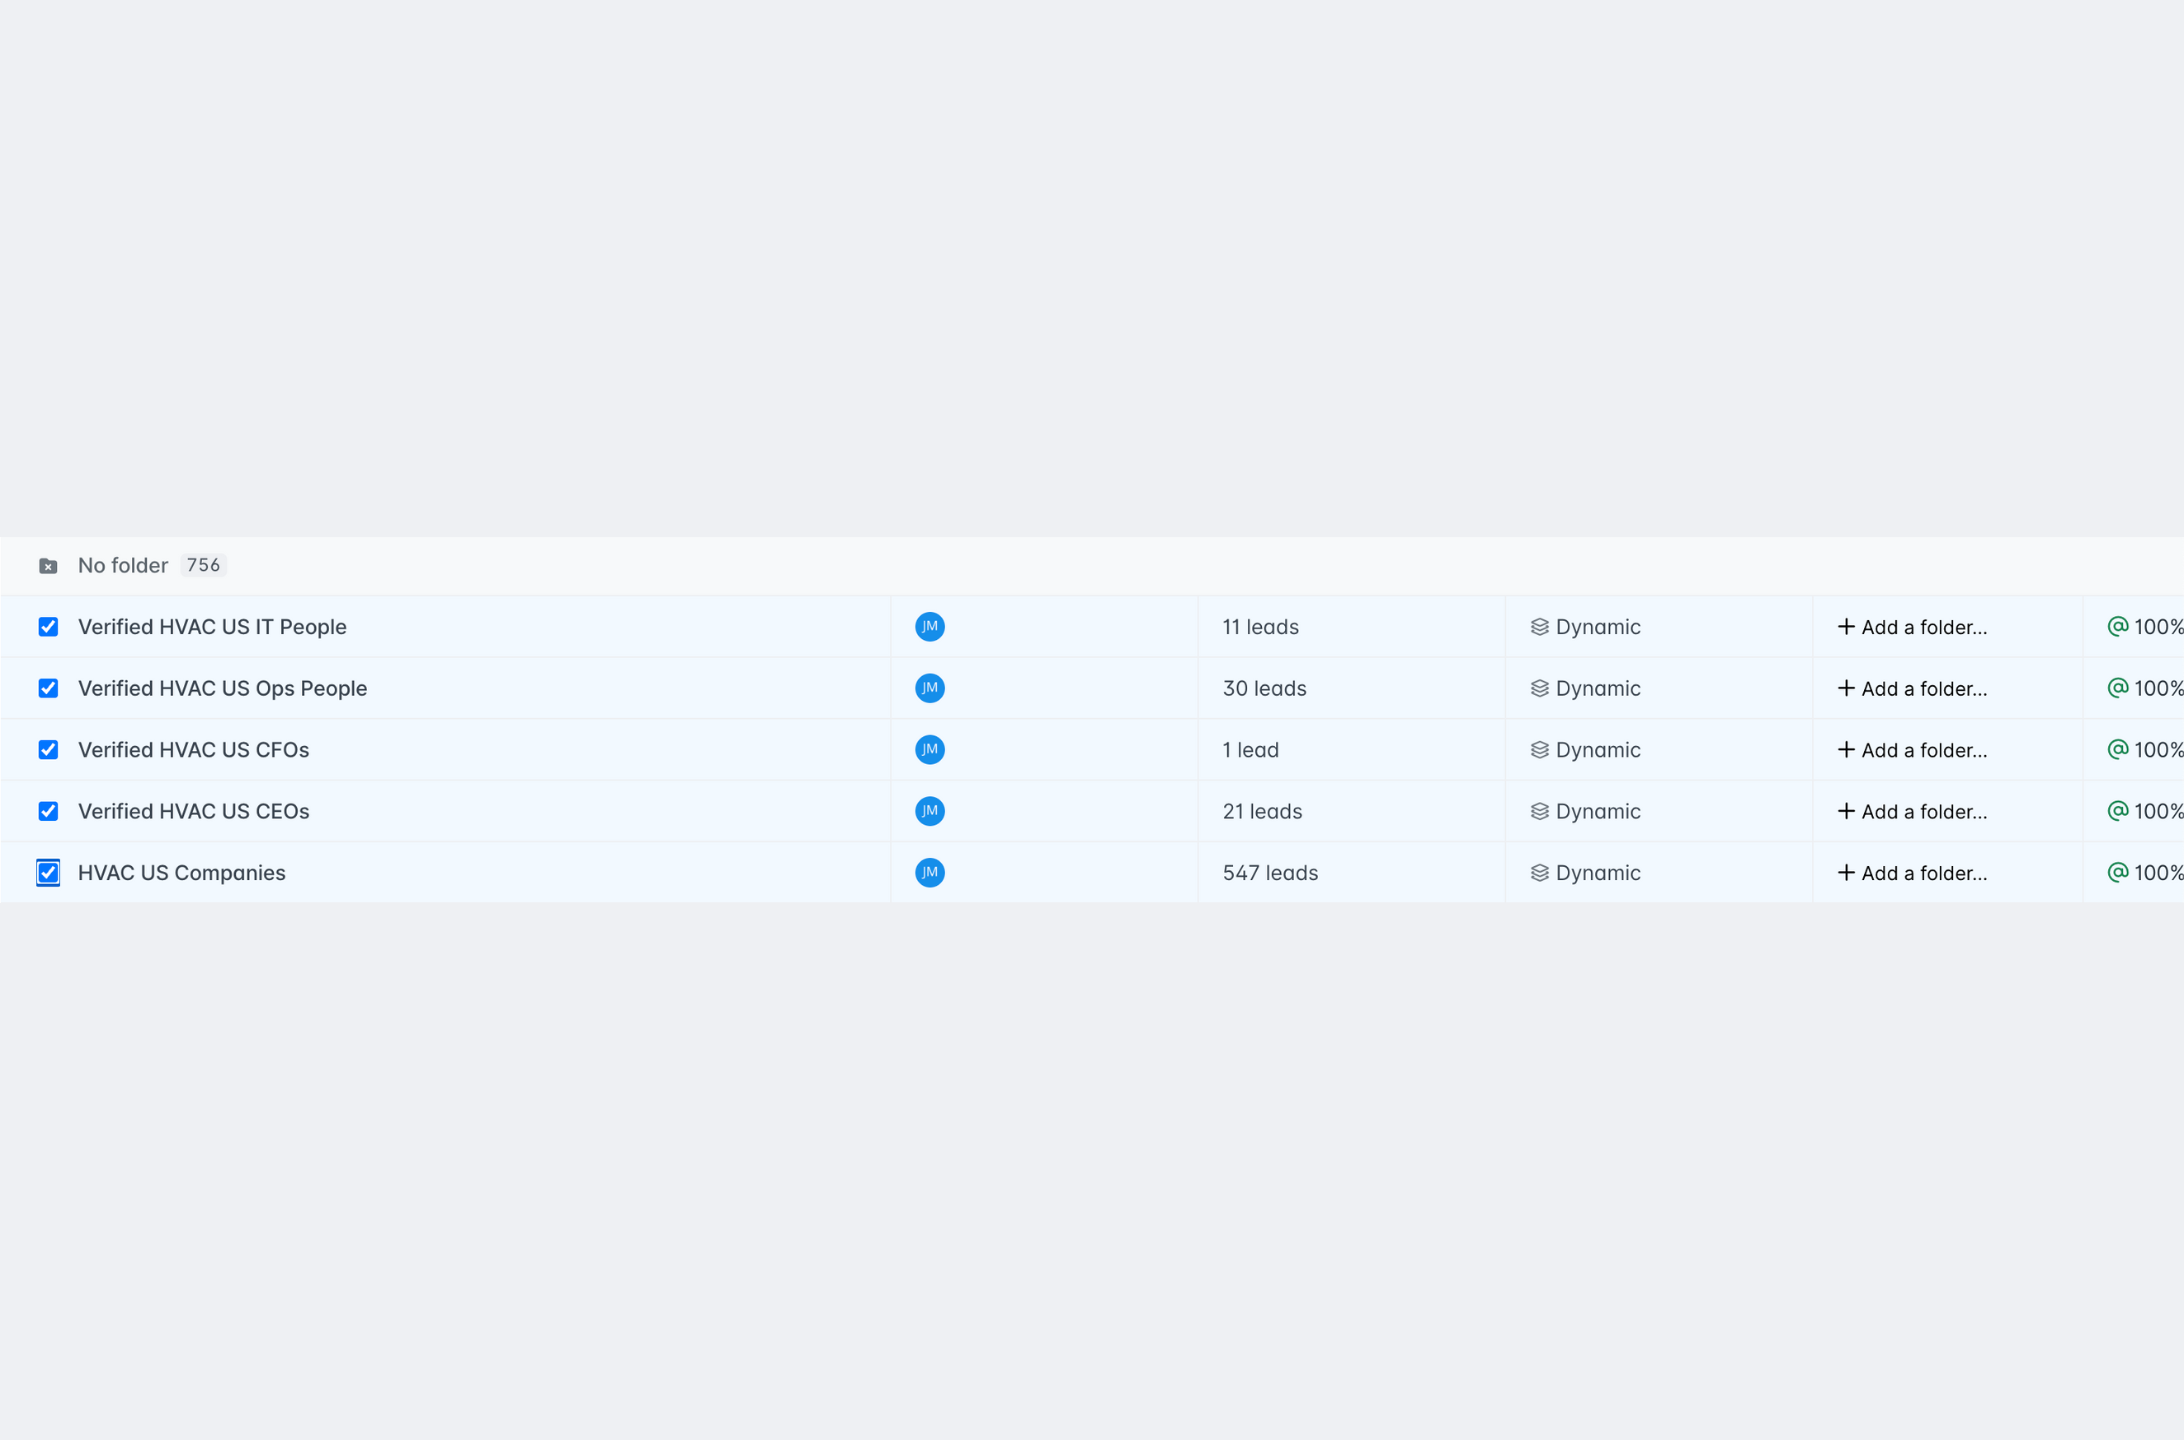
- We can then see our folder and click into each of our lists
3. How to view all our data
If we want to complete a similar process for all existing saved People or Companies, that’s possible through the “All People” and “All Companies” options.
This is immediately viewable from within the People or Companies sections.
These are easily accessible by clicking either tab found at the top of the left-hand panel inside Leads.
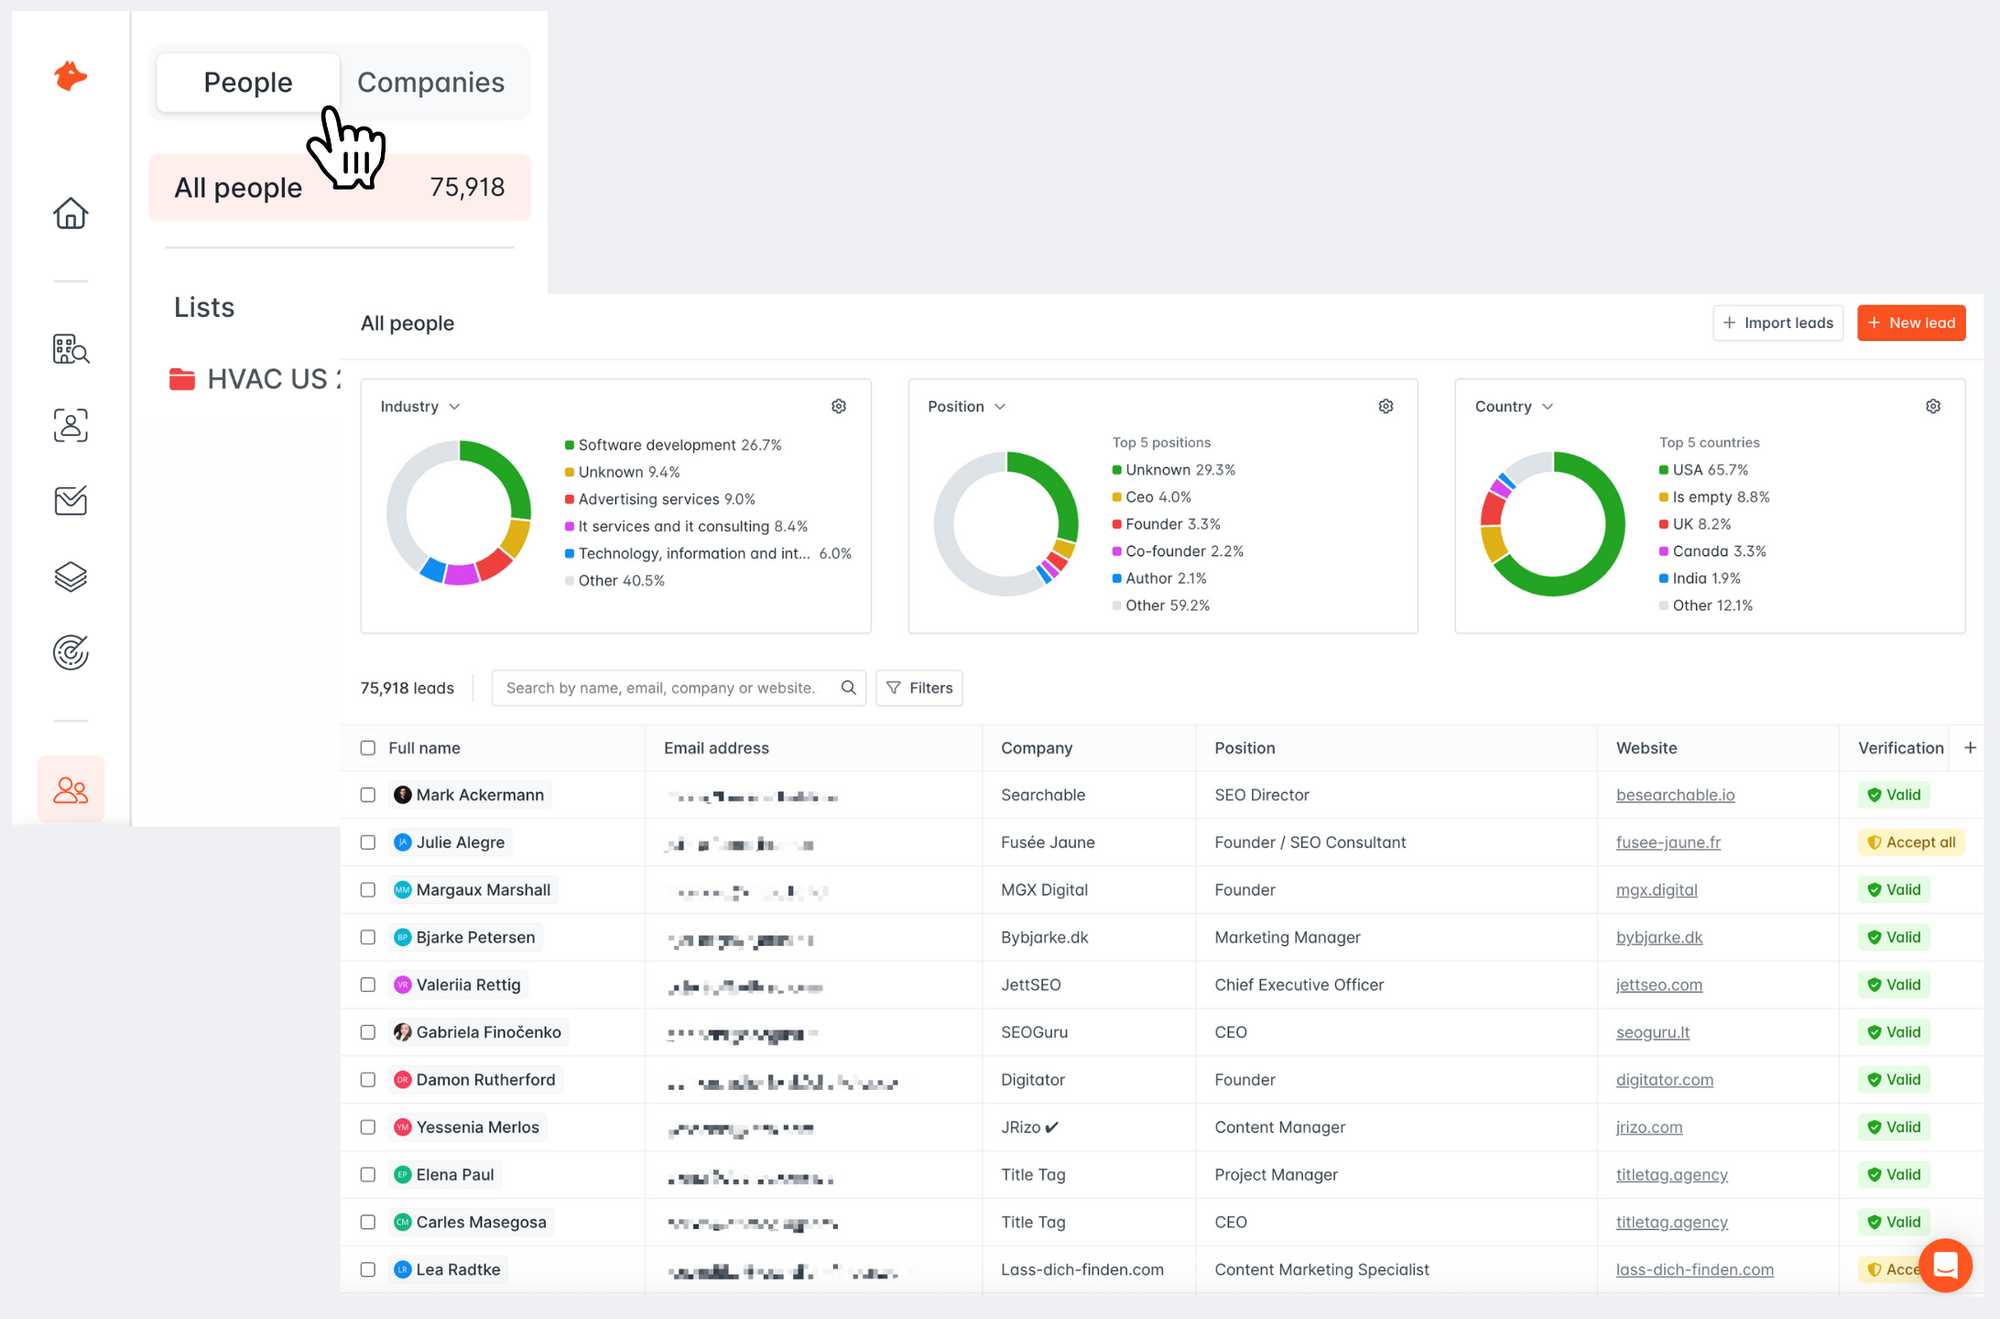
You’ll be automatically shown all of your People or Companies.
When you save People or Companies, they will be added to this view for easy organization and selection.
Try the new way to organize your Leads
This is just one example of a workflow where you can utilize the tools offered in our June 2025 update.
Whether you have an ever-evolving large database, need to find People quickly, or have multiple active segments that require regular updates, visit Leads today to try it.
And be sure to let us know how you’ve changed the way you manage your leads by leaving a comment below.


 Send cold emails with Hunter